* This post contains links.
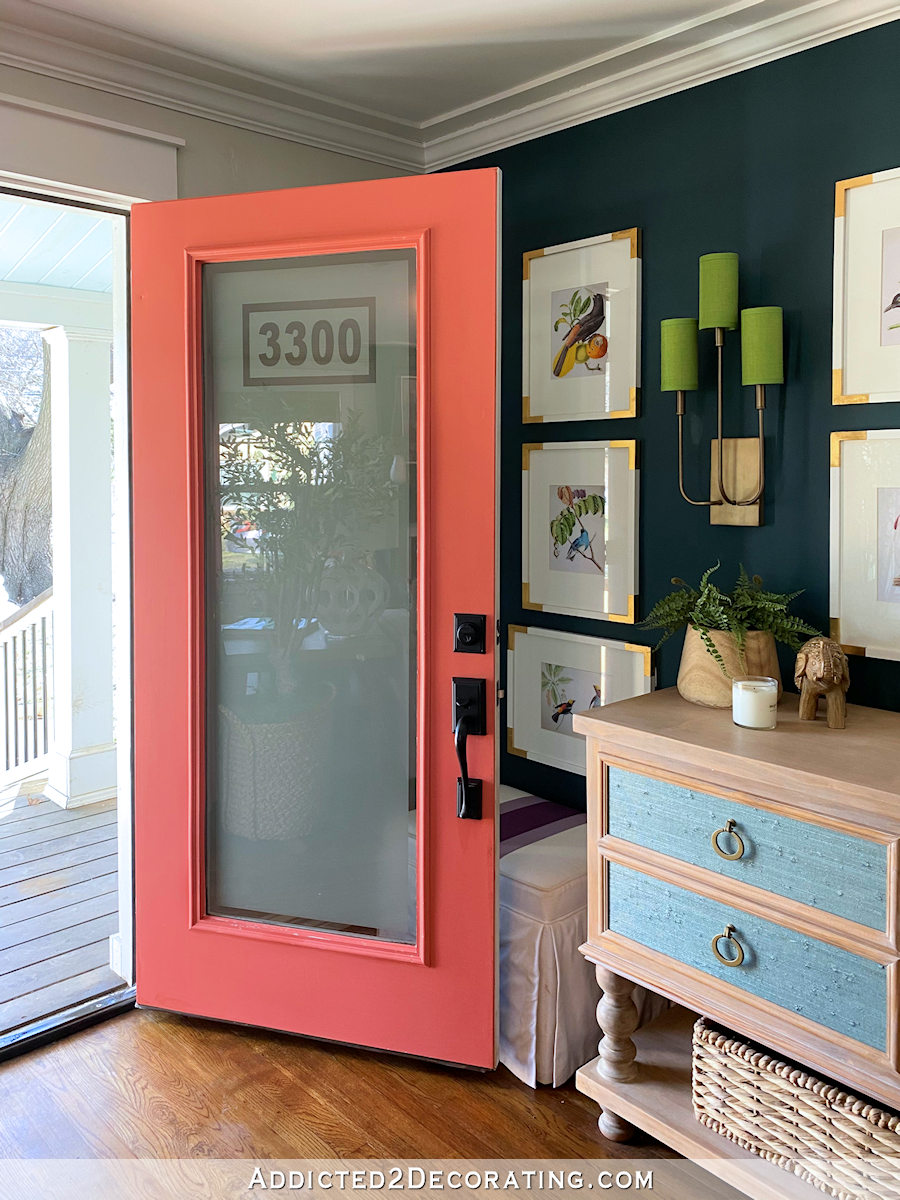
I have said many times that I have repaired living room furniture (which I will show you as soon as possible!). Now that the back of the couch creates a more defined entryway, that means any hour I sit on the couch (my preferred place to sit in the living room), my back is the front door. There’s something that never makes me happy about my back to a full glass door, especially when sitting on the couch at night.
So I decided to freeze the front door and include our house number. Here’s how it happened…
I use my Silhouette to cut out house numbers Crazy privacy frosted film, which makes it easy and accurate. If you don’t have a Silhouette or Cricut, you can cut the figures by hand. It’s a tedious job, but as long as you use a new blade on an X-acto knife, and give yourself time to figure out the numbers, it’s possible.
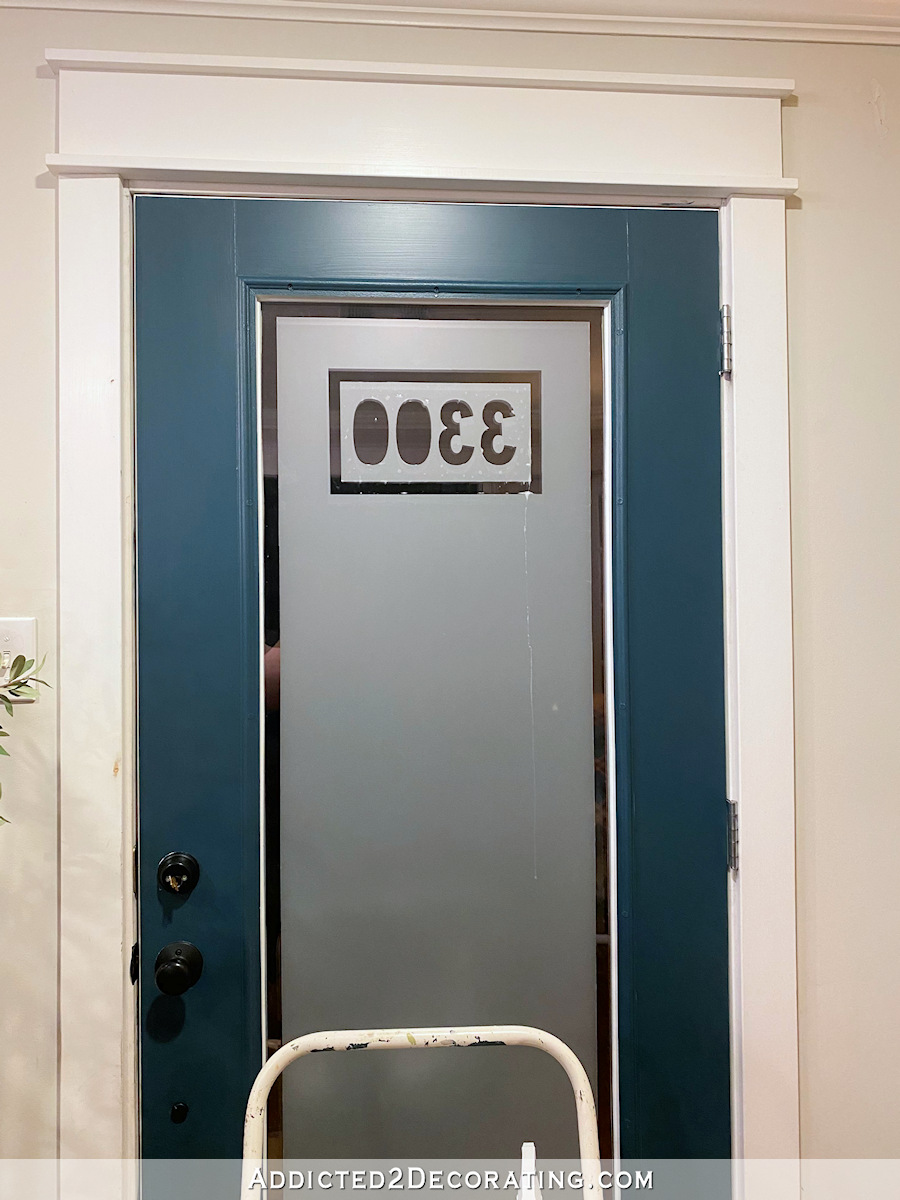
But I did it the quick way. I made a rectangle about 11.75 inches wide and 6 inches high, and then filled it in with multiple numbers using Arial Black font with a size of about 330pt. I also need to keep in mind that when placing the film on the cutting mat, the side of the film with clear plastic (i.e., the plastic removed and discarded to expose the sticky side of the frosted film) will face off.

The Silhouette cutting mat is sticky so that it holds the paper (or whatever is being cut) firmly in place during the cutting process. That’s why removing the frosted film from the sticky cutting mat is a bit tiring and a bit tedious because the film can tear easily if you’re not careful with it. But I got it without a tear and put it on while I worked on the door.
I cut a piece of film the approximate width of the glass, and then used a most generous amount. the application solution, sprayed straight on the door, to put the film where I want it. Once I had avoided the support and the film was in place, I used the squeegee that came with the application solution to remove the excess liquid from under the film.
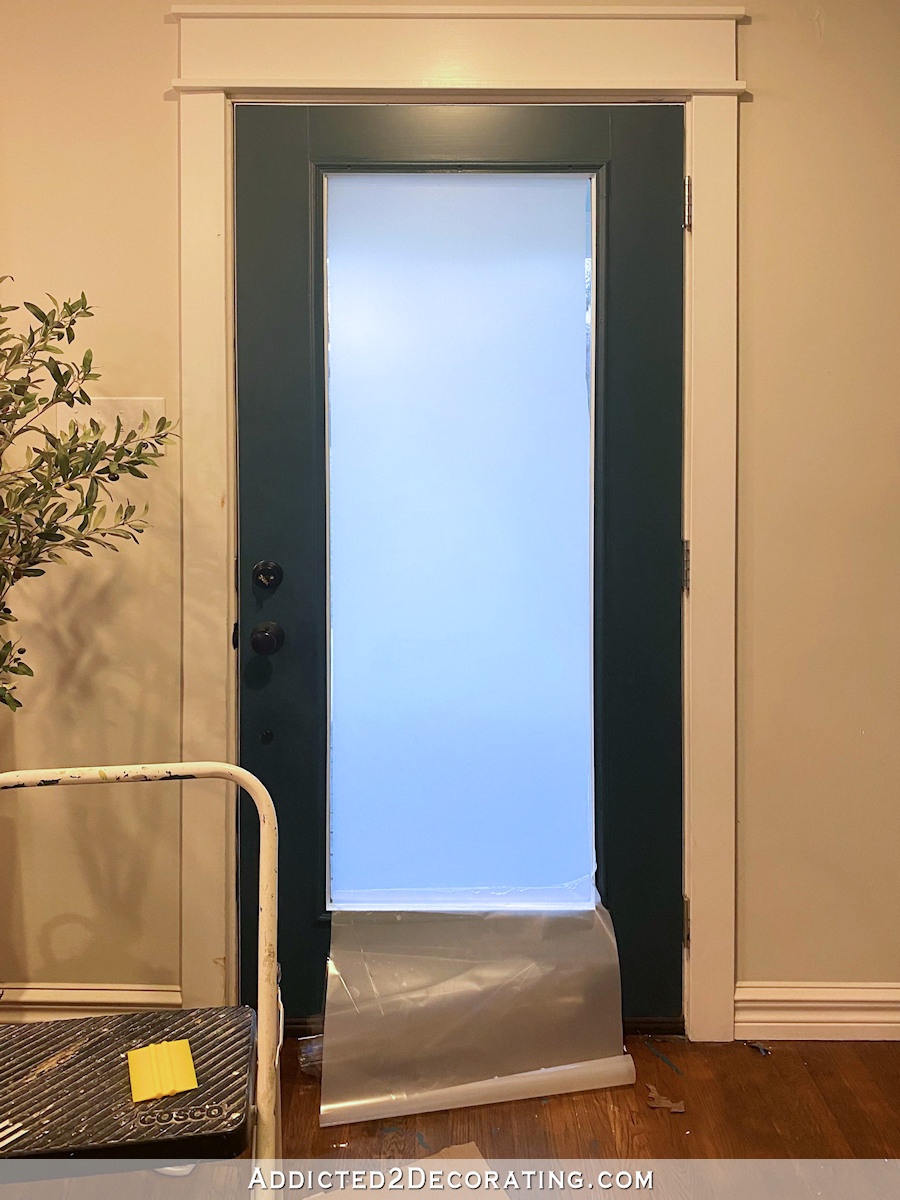
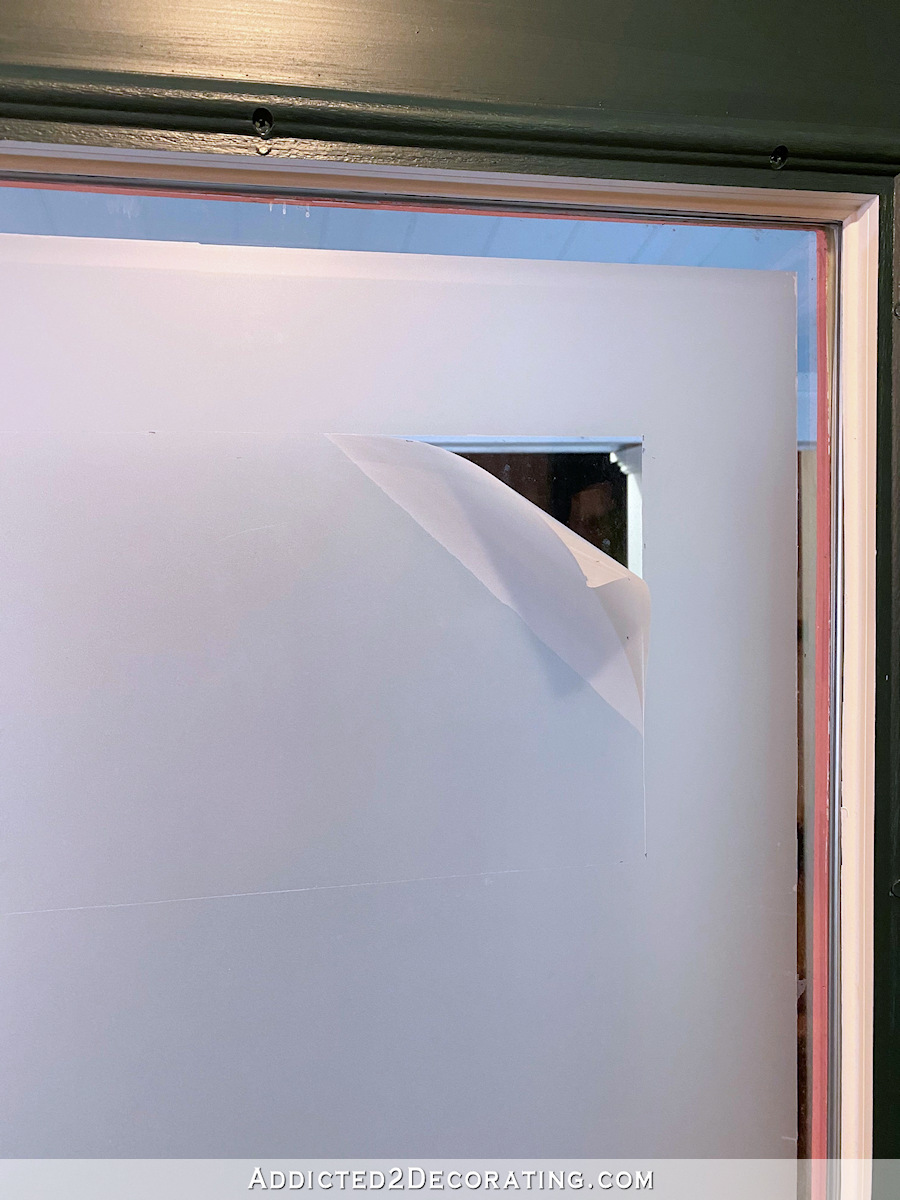
It got me two tries. The first time I did this, I had five pieces of dog hair, as well as a few more barefoot pieces of lint and dirt accumulated between the film and glass. I tried to convince myself to live it, but I couldn’t. When I decided to take it off and start over, the film had been there for over an hour and had dried and was very tight, so when I took it off, all the adhesive remained on the glass.
So I had to go to the automotive store and get the Gila adhesive remover (it is brought to auto stores because it is used to remove tint film from car windows) to clean all the adhesive residue from the glass and start too.
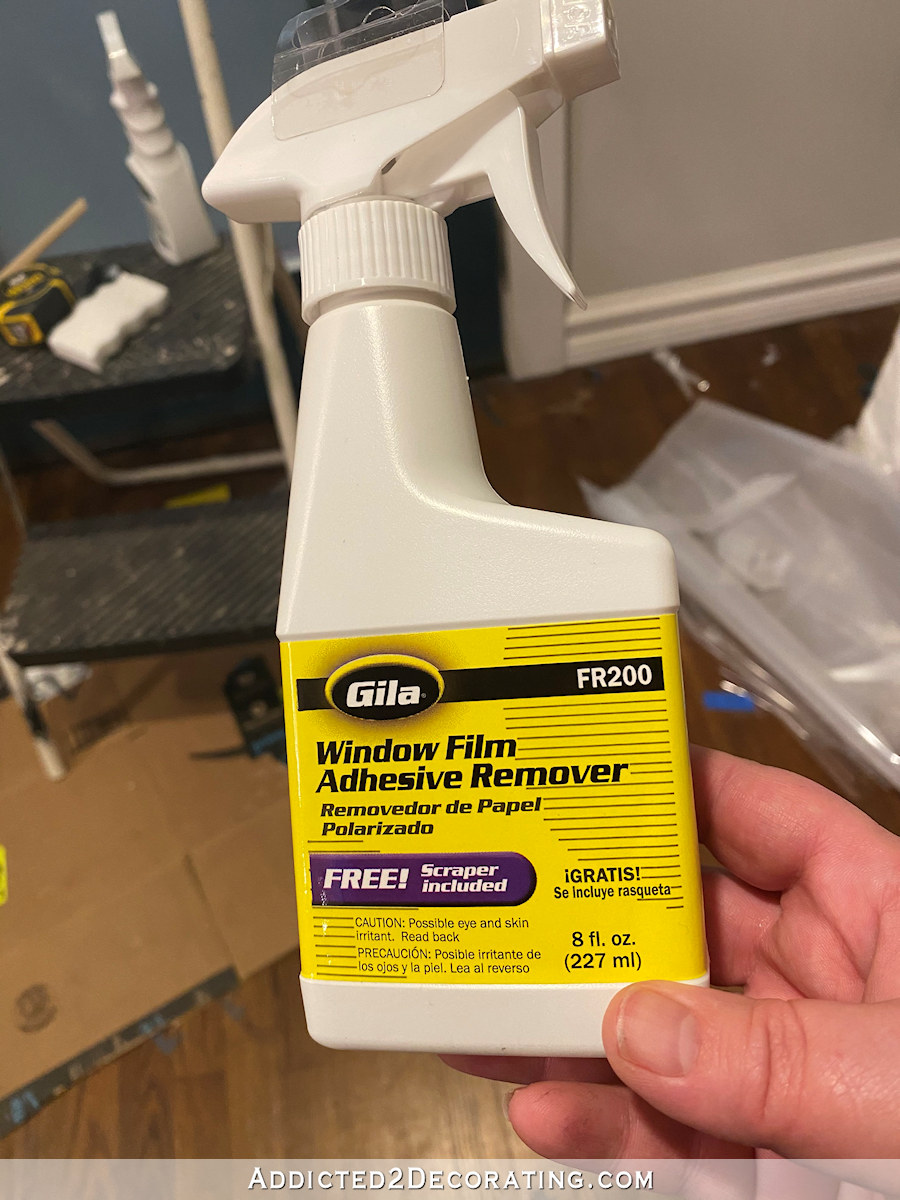
That thing would act like a charm. If you need to remove this film from the glass, and there is some sticky left, any other way of trying to remove that film (including Goo Gone) will fail the heck out of you. I know this from experience. 😀 Don’t bother to try other medications if this thing is too good.
So after removing all the residue from my first try, and cleaning the glass even more than I did the first time, my second try was very surprising. Not a single piece of dog fur or other particles was trapped under that film anywhere.
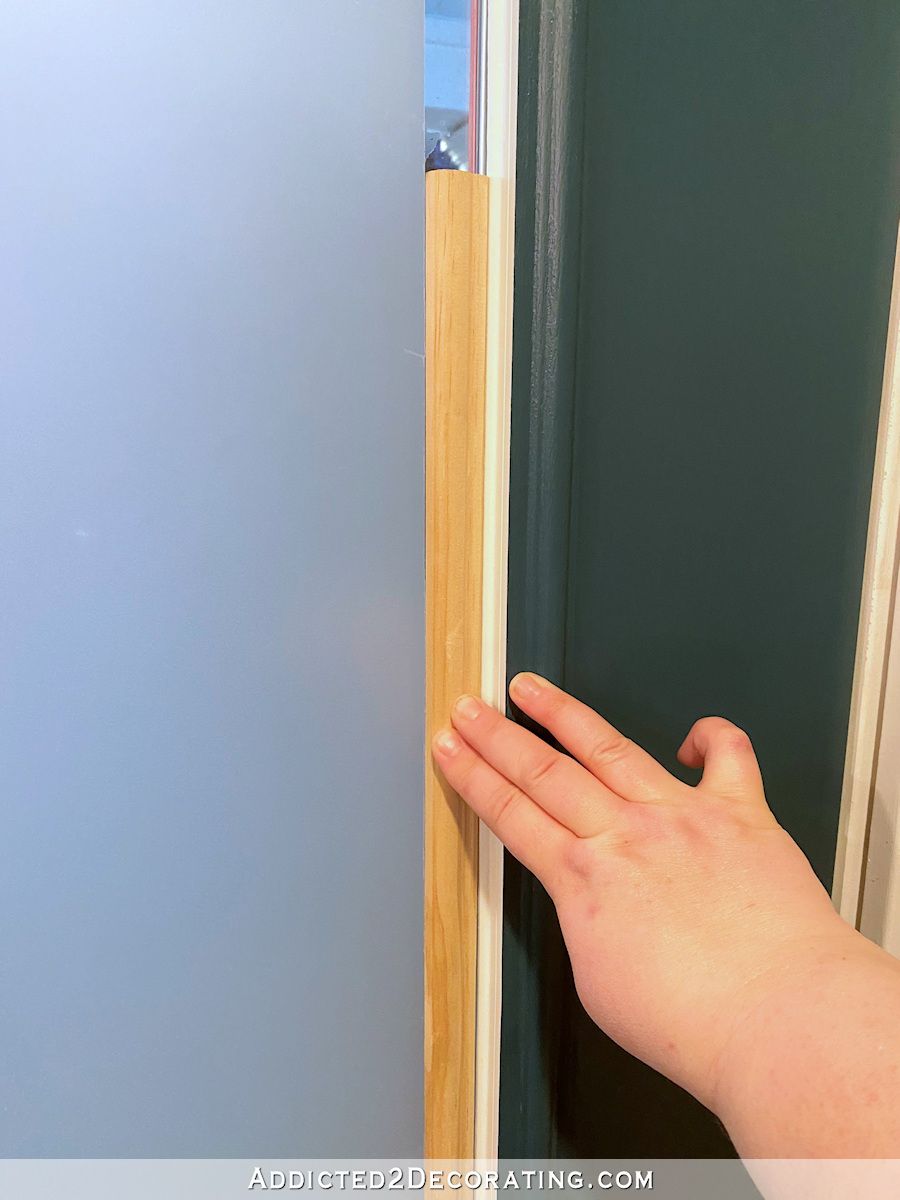
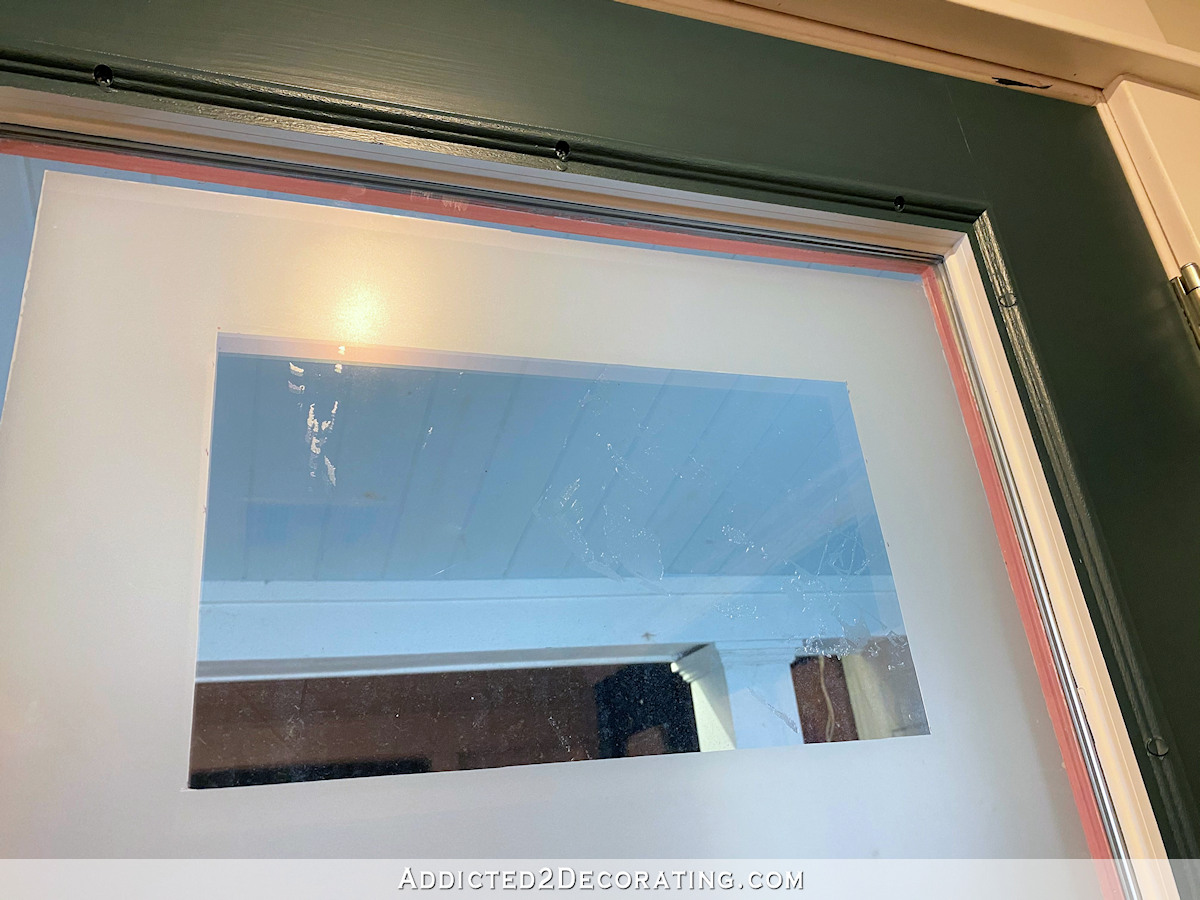
With the film all over the glass, I immediately used a piece of scrap trim (about an inch wide) as an instruction to cut a border around the glass. I did this using the trim tool that came with the application spray and squeegee.
And once that is cut all the way and removed, like this…

Just a warning, after you apply the frosted film, you have about 45 minutes to an hour where it will transfer easily. Once you’ve passed that time, and it starts to really dry on the glass, it’s impossible to remove without leaving a sticky residue. So if you cut a border or add numbers, do it all the time. Don’t wait and do this project in phases of two or more days.
Next, I moved on to house numbers. I measured the rectangle I cut with my Silhoutte (which is 11.75 ″ x 6 ″), and added 1.5 inches of both height and width to give me the size of the rectangle I needed to cut the window film. I measured very careful for laying so that it is equal from the sides and the top, and then using my same straight edge (i.e., the scrap trim piece), and an X-acto knife with a new edge in it to cut the rectangle where the house number will go.
Most are quick to come by, but there are a few areas where sticky residue remains.
So I sprinkled some adhesive remover on a paper towel (I DIDN’T spray it directly on the glass), and then carefully and strategically used the paper towel wetting the adhesive remover to remove the adhesive. I used extra care to make sure I didn’t get any adhesive remover on the frosted film. Here’s what it looks like after everything is cleaned up and ready for the numbers.
Separating the window film of the house figures from the protective plastic is probably the most tiring part of the whole project. It would have helped to have an extra set of hands to keep the peeled film away from the plastic or any other surface, but I was able to do it on my own. I didn’t rush it because the film would have been too easily torn, or that it would have stuck to itself. And when that happens, the game is over. There is no choice but to cut out a number at home. Once you get the film yourself, it’s no longer saved.
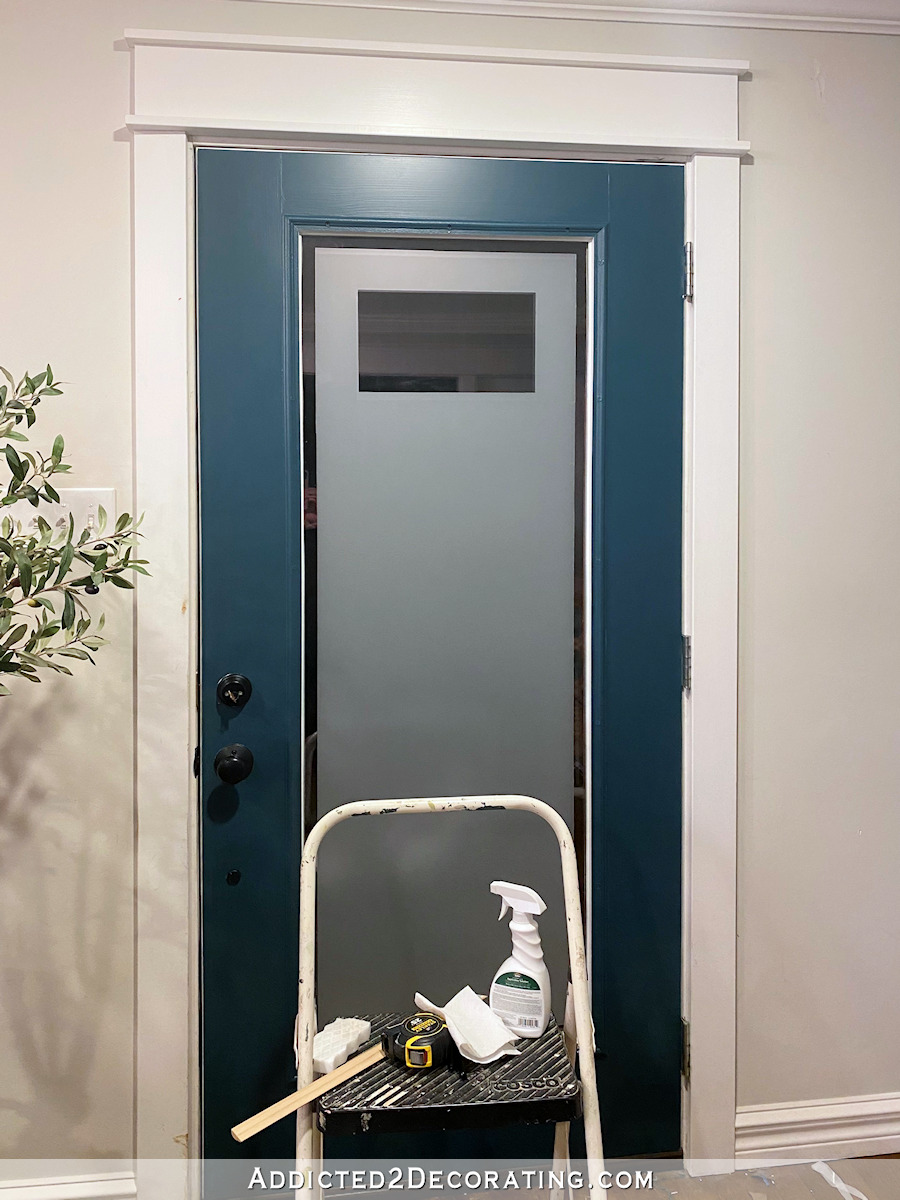
So it took a lot of patience, but I managed. And then I sprayed the film application spray on the house numbers rather than the glass, and put the numbers on. Before doing any squeegeeing, I went back to look at the numbers and make sure the placement was correct.
Afterwards I carefully printed out the house numbers. I took my time, and tried not to be too pushy at first. If you spin a small number of home pieces of film with the same pressure as the main film, it will definitely work, and after that it will be a struggle to get it back in place. That’s why I work so hard and methodically.
And finally, I put the two pieces in the middle of the zeros, and it was done.
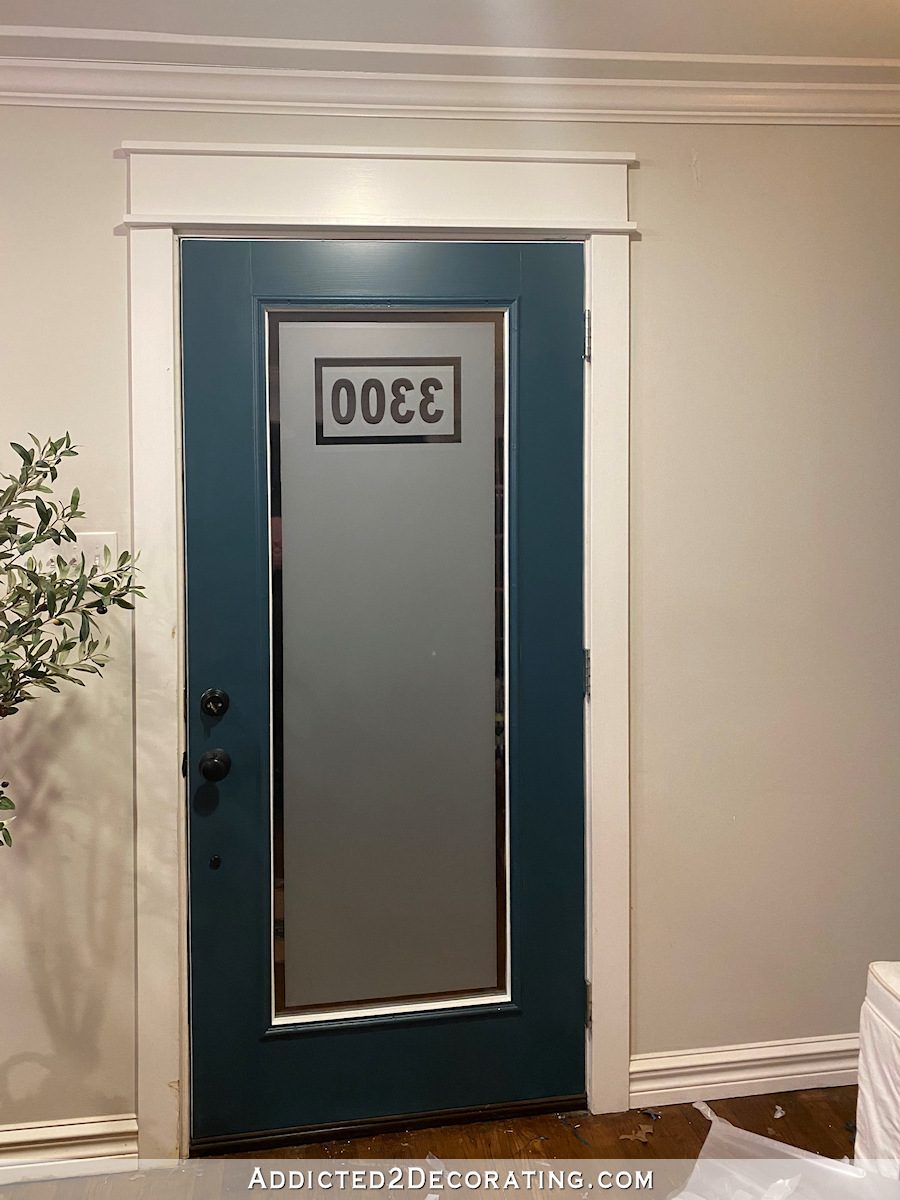
If you’re wondering why the inside of the door next to the glass is white, it’s because the spray used in the application literally removes the paint in places. I have no idea how it affected that area, but it didn’t affect the other areas of the door where the spray was running. But the paint on that interior area came out almost as a solid piece. It’s a completely white border, so I’m not sure if I’ll have a hard time painting it.
Anyway, here’s how it will look when I’m done.
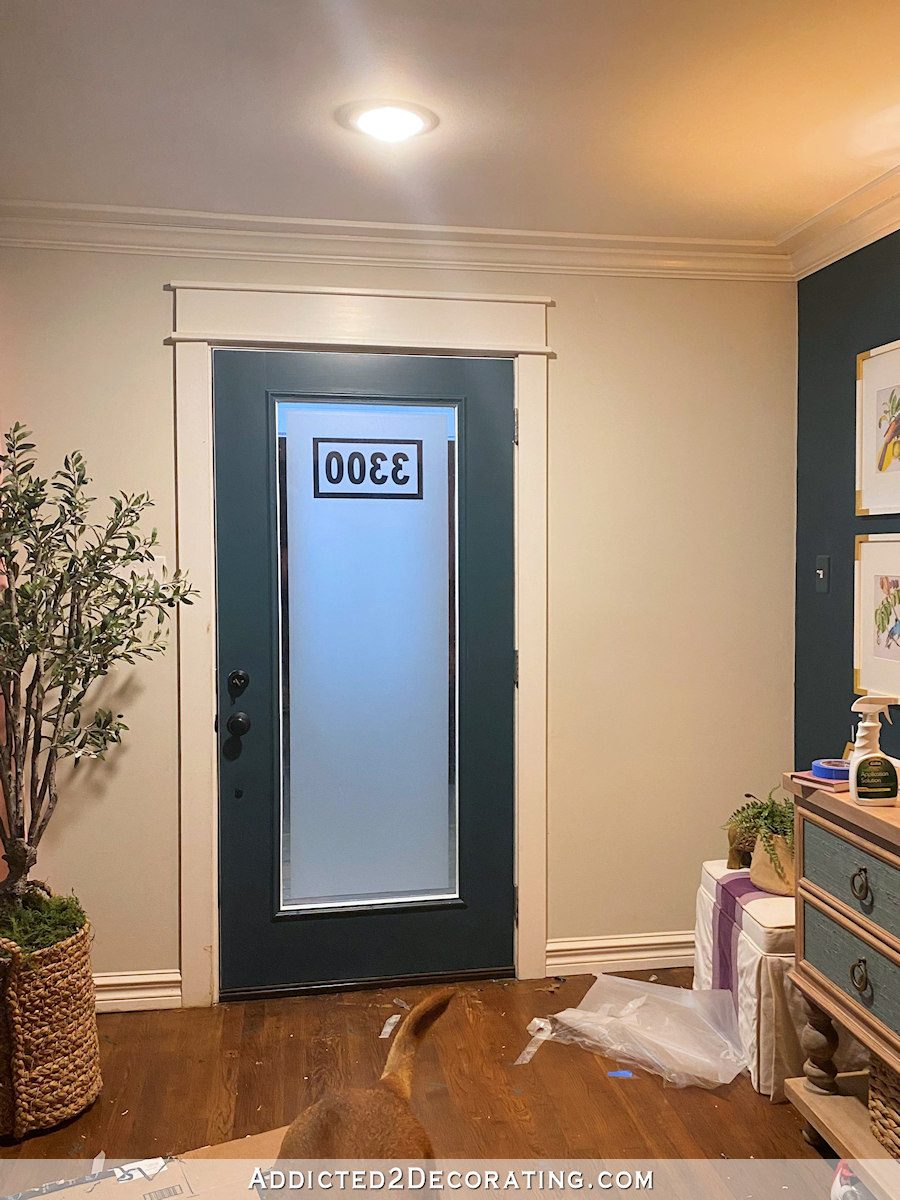
And here is the vision this morning…

It definitely shows up better at night (obviously), but it also shows up better when I take a photo in the afternoon than in the morning when the sun is shining through the front door and windows.
Here’s an early morning look from the outside…
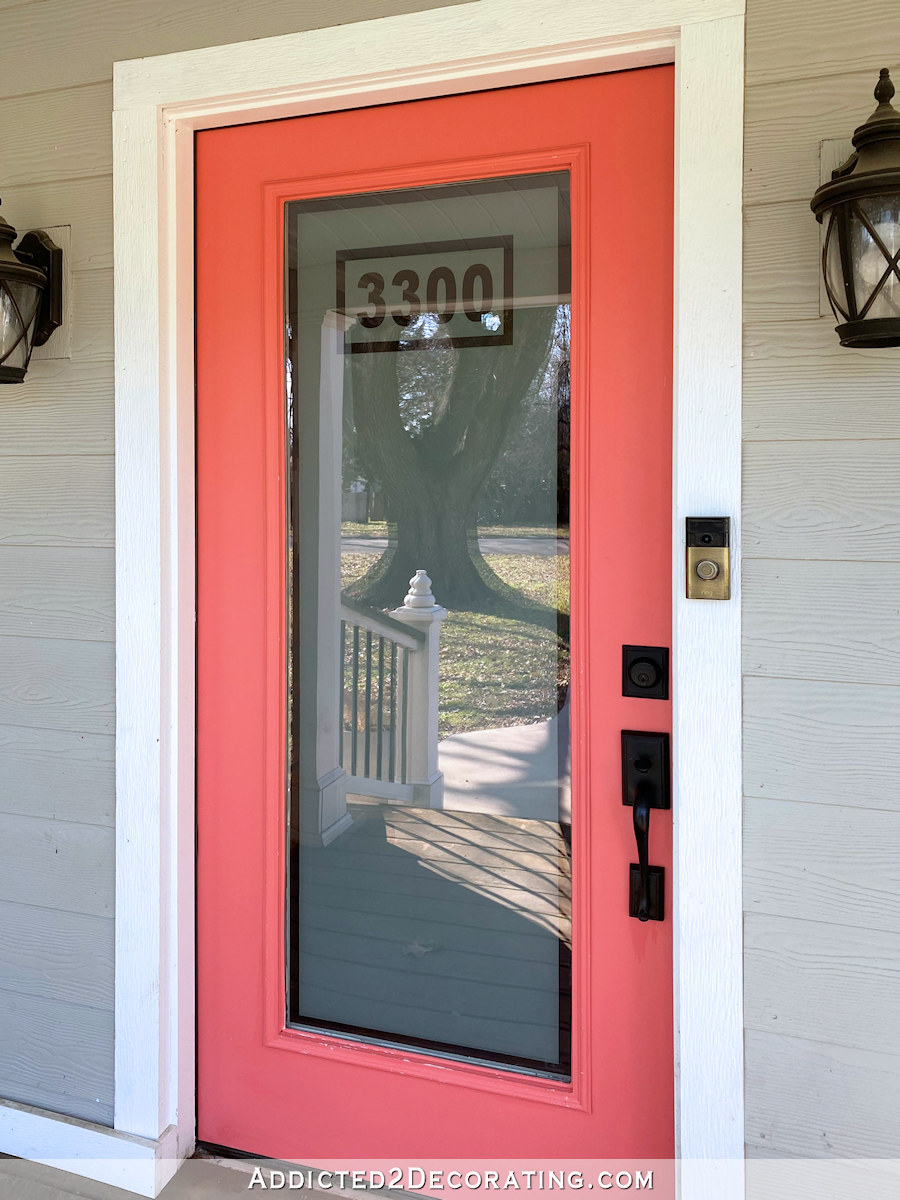
I love how it’s done. And now I don’t feel more exposed and vulnerable when I’m sitting on my sofa with my back to the front door at night.