[ad_1]

Looking for a fun and easy DIY project for kids? This rustic craft stick home decor is perfect! Using just a few simple supplies, you can create a beautiful little house that can be used as a decoration or even a toy. Your kids will love using their creativity to design their own home, and you’ll love the finished product. Not to mention, it’s a great way to recycle some old crafting sticks!
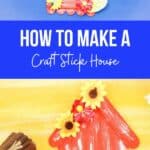
Craft Stick House
This craft stick house is a fun and easy project for kids and adults. It can be used for a variety of different purposes, and it is easy to make. With a little creativity, you can make a popsicle stick house that is truly unique.
There’s nothing more classic than a craft stick project, and we’ve done a ton of them in the past. If you like the idea of the house, you may also like holiday craft stick gingerbread house or this simple craft stick bird feeder idea too!
Which Glue is Best for Connecting Craft Sticks?
There are several different types of glue that can be used to join craft sticks together. Basic white glue or wood glue is usually sufficient. However, if you want a stronger bond, you can use a hot glue gun. You can also use a glue stick, which is a type of adhesive specifically designed for use with craft sticks.
Whether you use white glue or wood glue, it’s important to make sure the sticks are lined up correctly before you glue them together. You can use a ruler or a straight edge to help you line up the sticks. Once the glue has dried, you can use a craft knife to trim off any excess glue.
If you are using a hot glue gun, it is important to be very careful. The glue can be very hot and burn your fingers. It is best to have an adult help the children with this project.
What Are Other Ways I Can Decorate My Popsicle Stick House?
Popsicle sticks can be painted or stained any color you like. You can also use a variety of different colors to create a multi-colored effect. Besides this quick change, there are some ways to update your home with a unique look. Below are some of my favorites.
- Add beads, sequins, or other small decorations to give the house a different look.
- Instead of paint, use markers or even crayons to color the craft sticks.
- Add a window to the house by cutting out a square and gluing a piece of cellophane to the back of the house.
- Give the shutters of the house with the window above by cutting small pieces of craft stick and painting them a different color then gluing them next to the window you made.
- Cut the sides of the craft stick into different designs with scallops or notches.
This project is a ton of fun to make and is definitely ideal for using your imagination to create something unique.
What Can I Use My Craft Stick House For?
Once you are done decorating your popsicle stick house, you can use it for different purposes. Sometimes, it’s not about the use, but just having fun creating, but below are some ideas on how it can be useful.
- Have the kids use it to create a diorama or their own little “city” to play with their other toys.
- Display the mantle with holiday-themed accents for fall or winter.
- Stick a wreath as an accent along with natural flowers or vines.
- Add an extra stick to the back as a brace to hold it on a shelf like a picture frame.
- Combine 4 in a house-shaped box and use it for kids’ playtime with dolls or small action figures.
You can use them or even make them for the kids to sit on the shelves in their room. And, although it has no exact purpose, parents and grandparents everywhere will accept it as a gift!
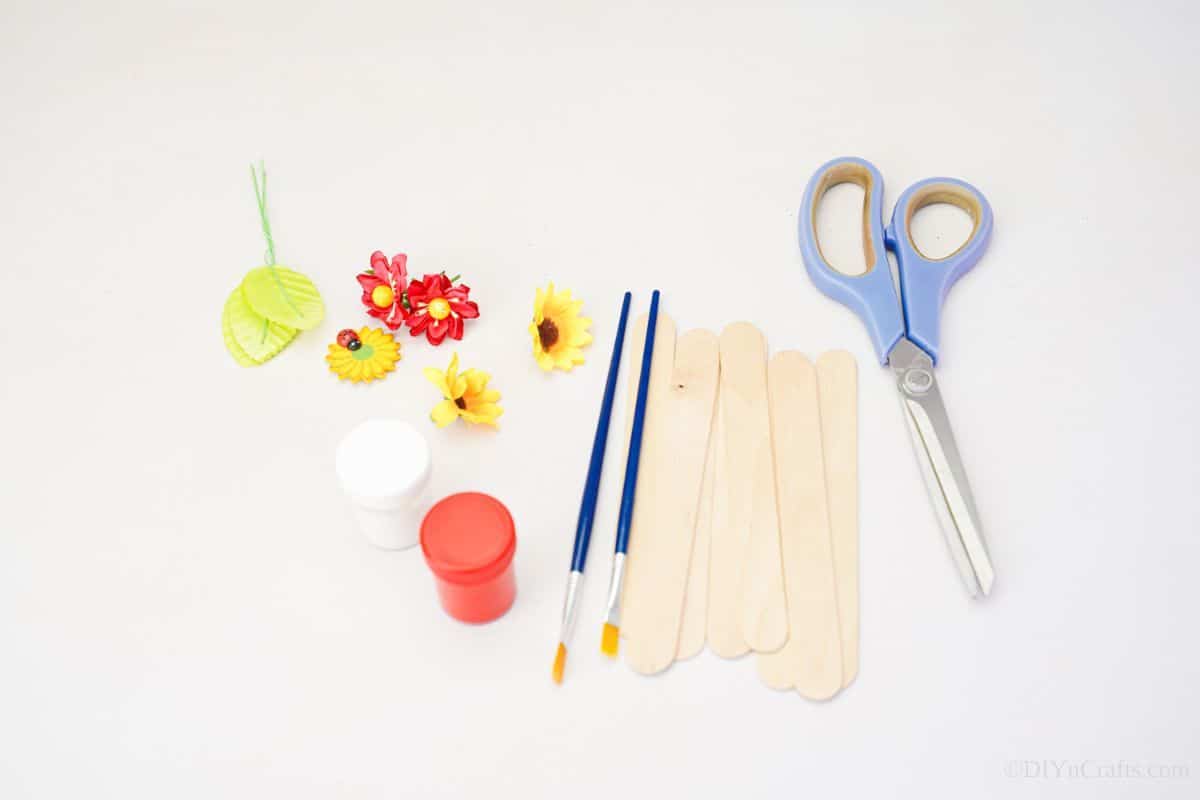
Supplies needed
How to Make a Craft Stick House
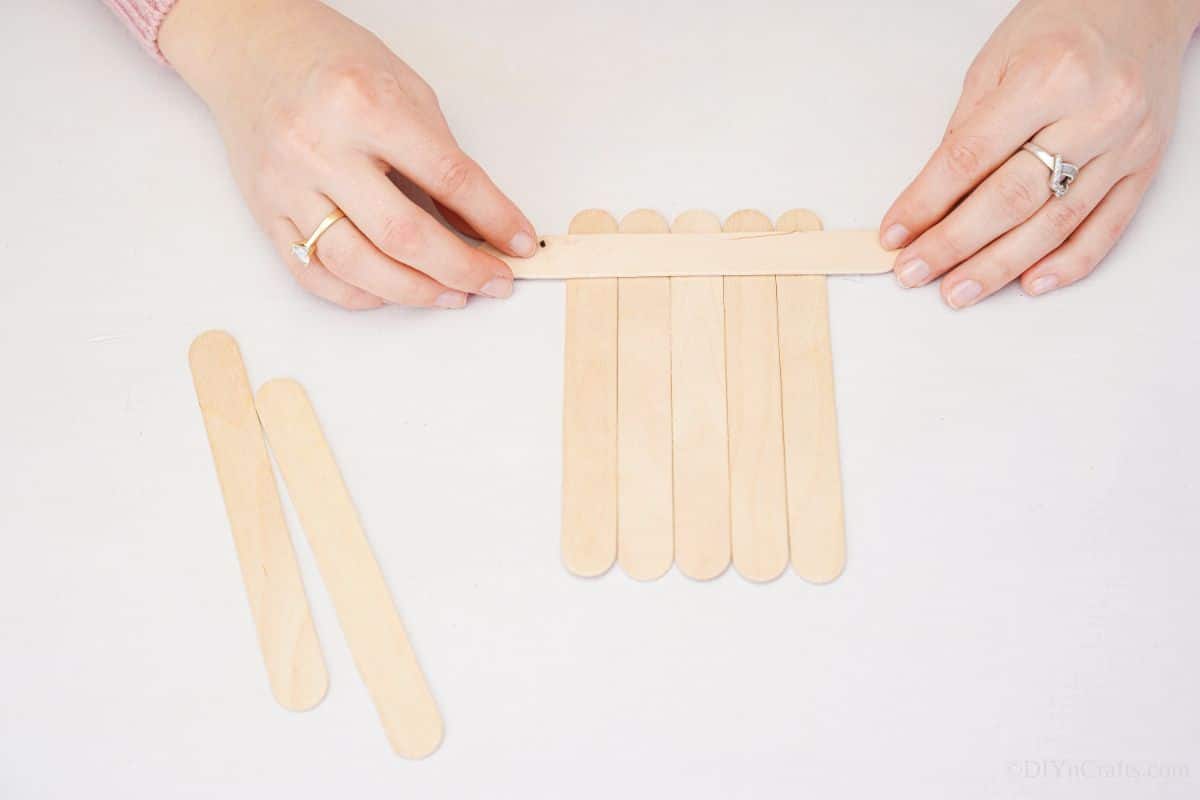
To make this little project, you’ll want to grab the supplies and get them all together. When making with kids, I also recommend having a second project for them to work on while the paint dries on it. Each house will require 8 craft sticks if made as described here. Larger houses may have more sticks.
To start, you line up 5 of the craft sticks so they are side by side. Then, you place one of the extra sticks on top of the bottom end of the sticks you lined up. Glue these together to create a base to hold all the sticks.
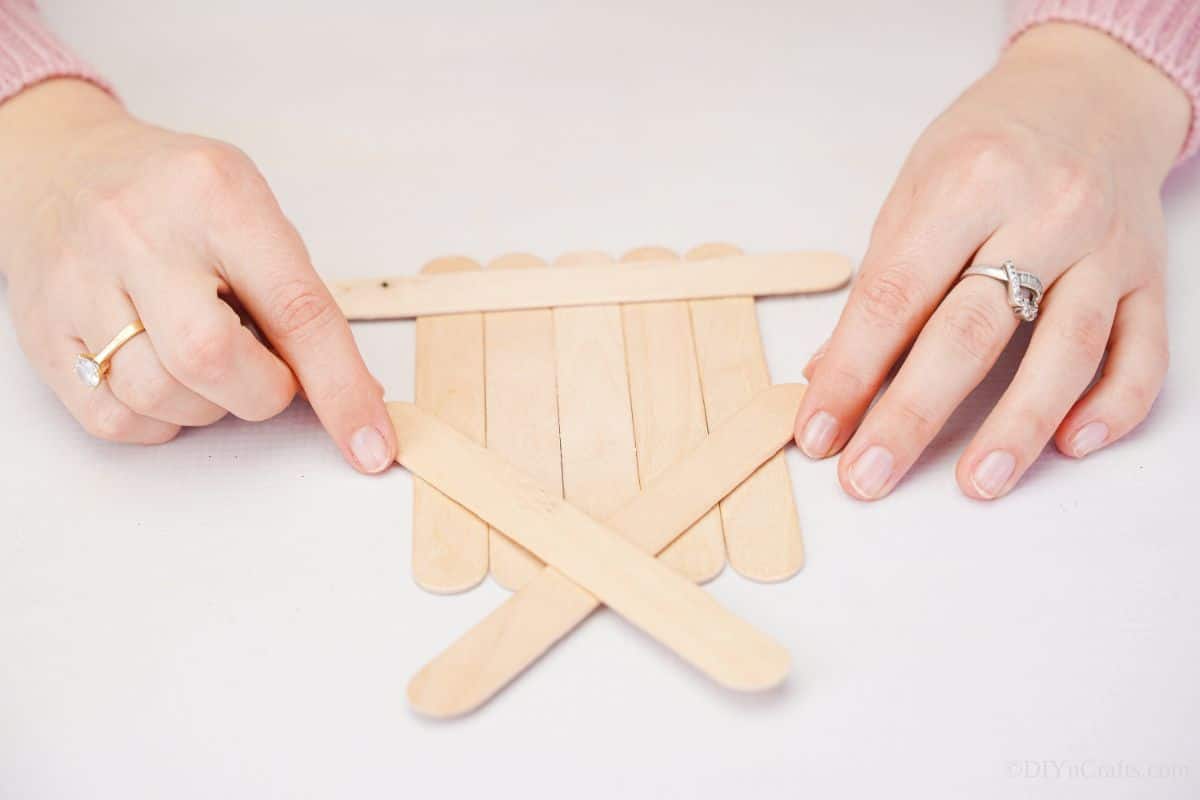
Now, place another craft stick at an angle on the top half of the “house” so that it rises above the craft sticks. Then add a second craft stick opposite it to form the classic triangle roofline.
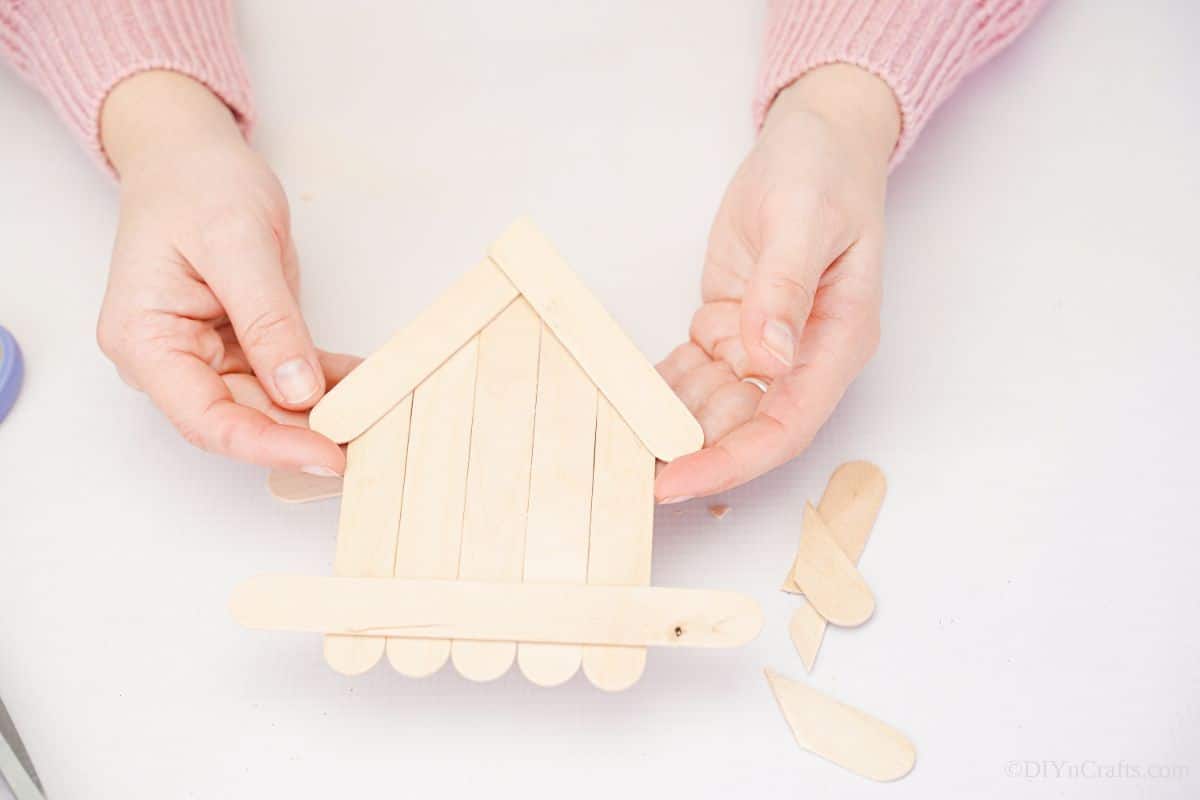
Be careful to cut off the excess craft sticks on either side and trim to give the house a pointed roof look. Now, cut the bottom stick leaving only the shape of the house.
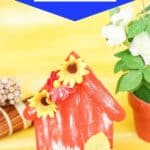
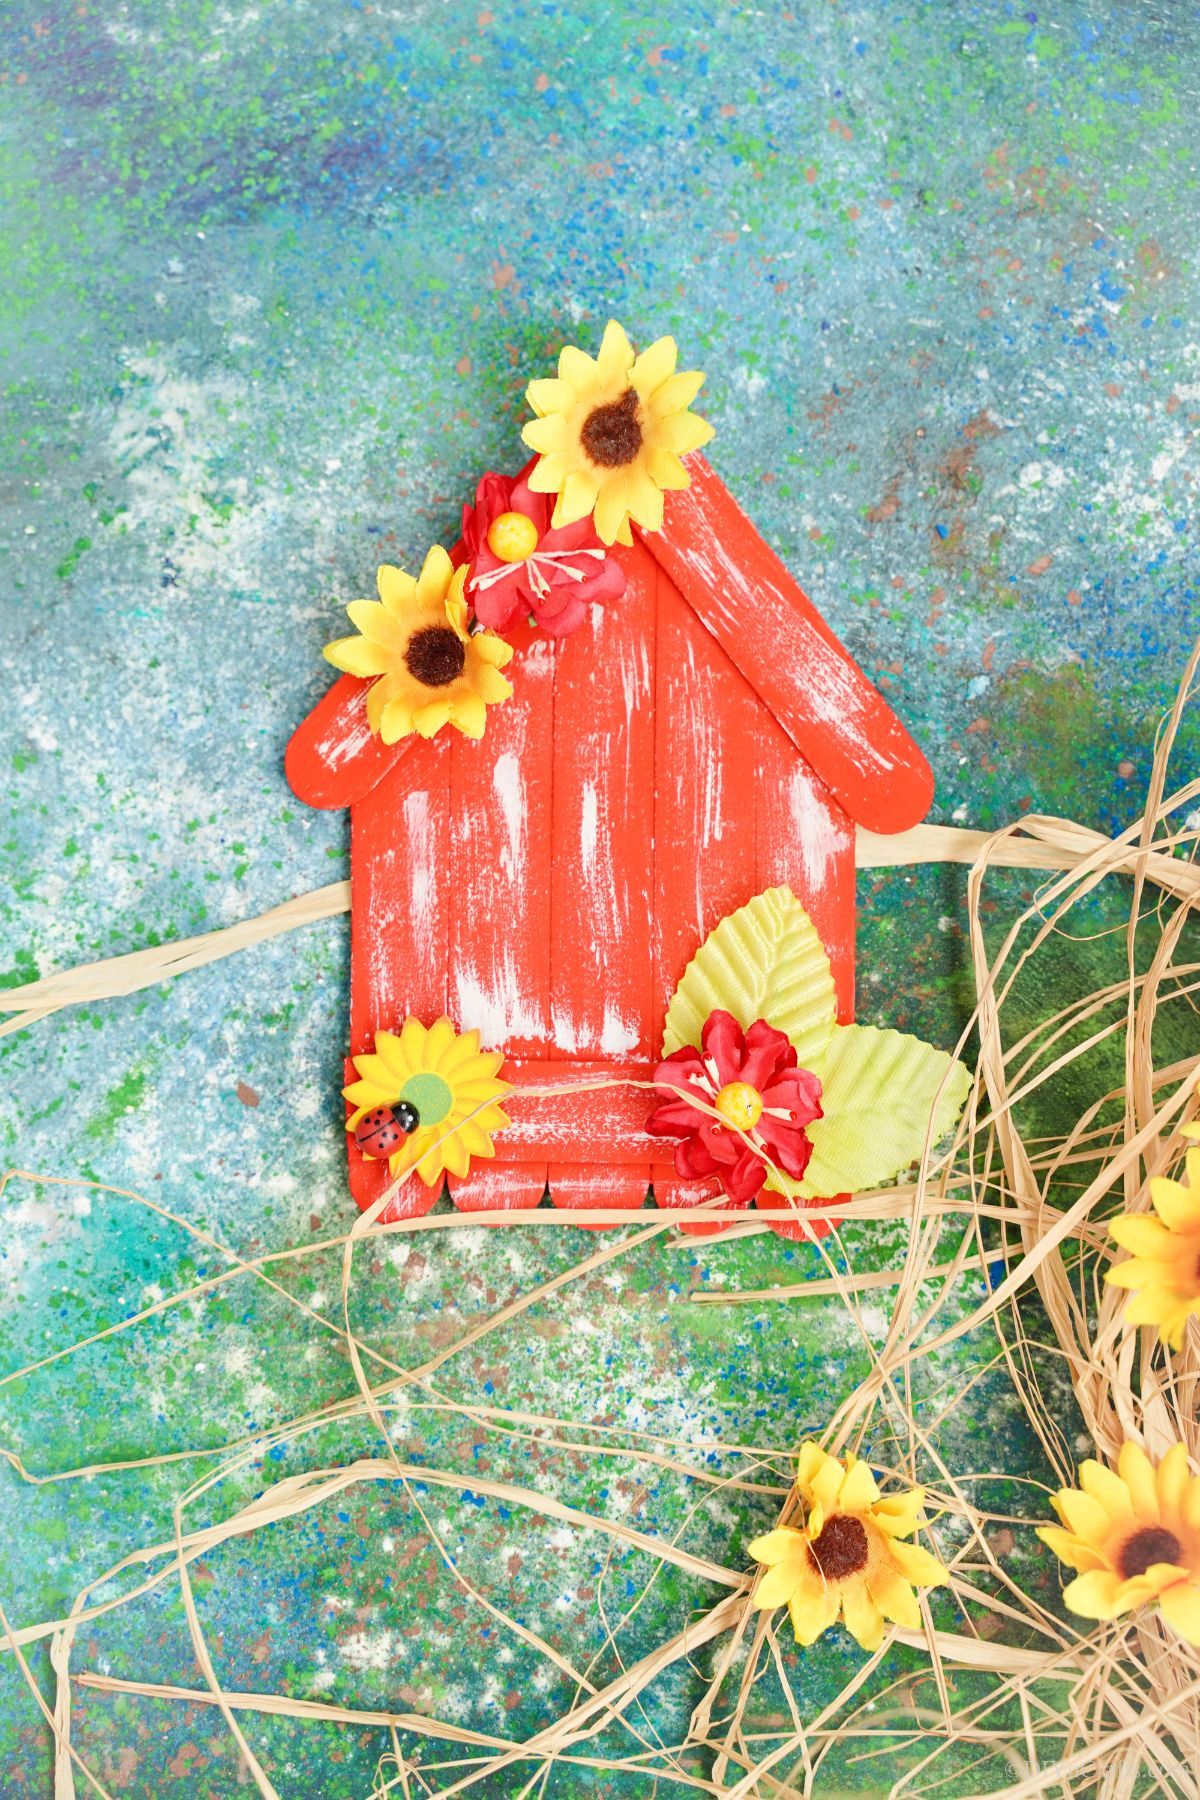
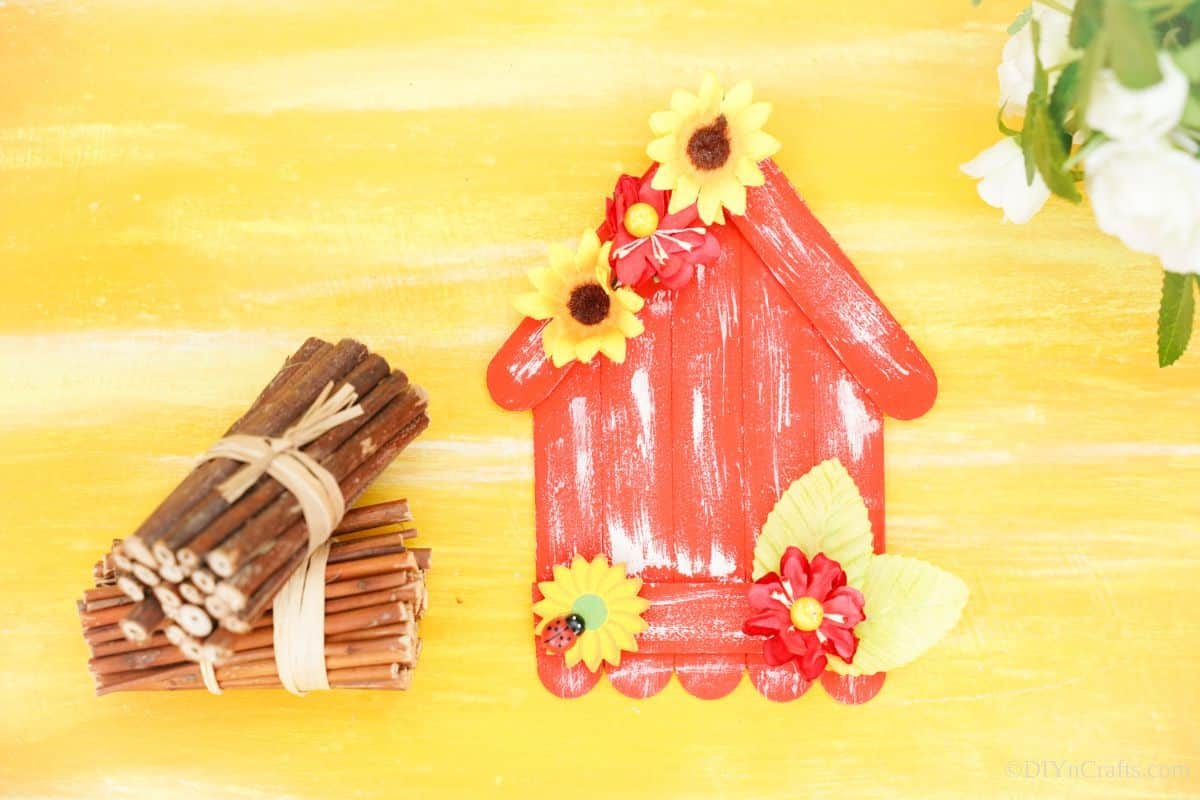
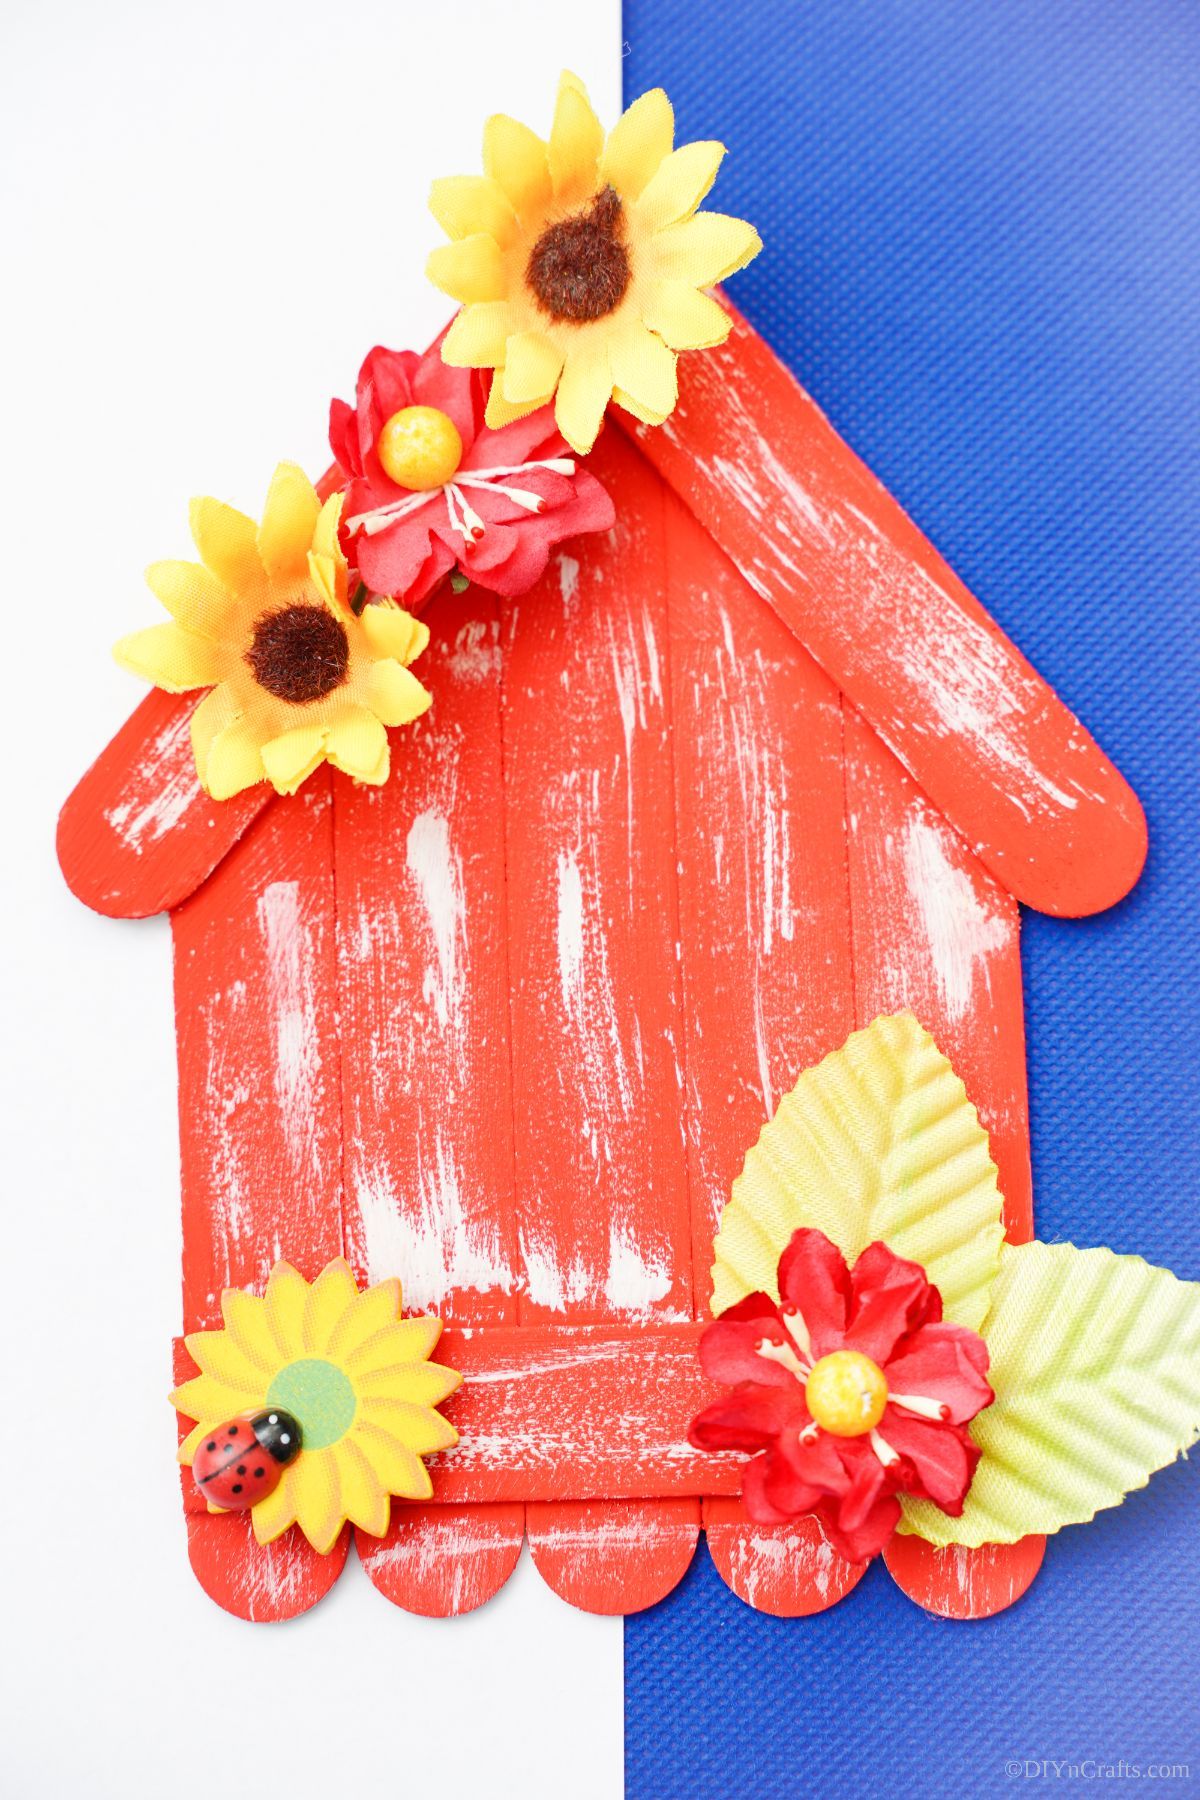
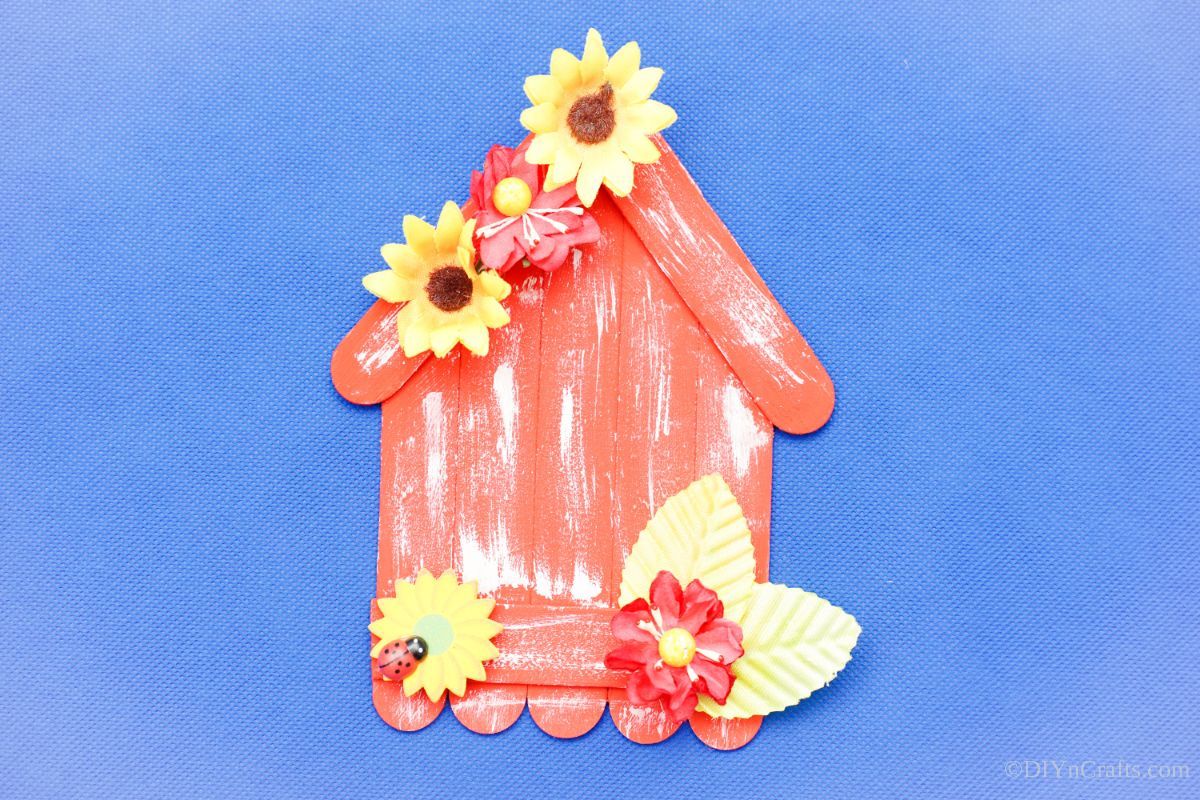
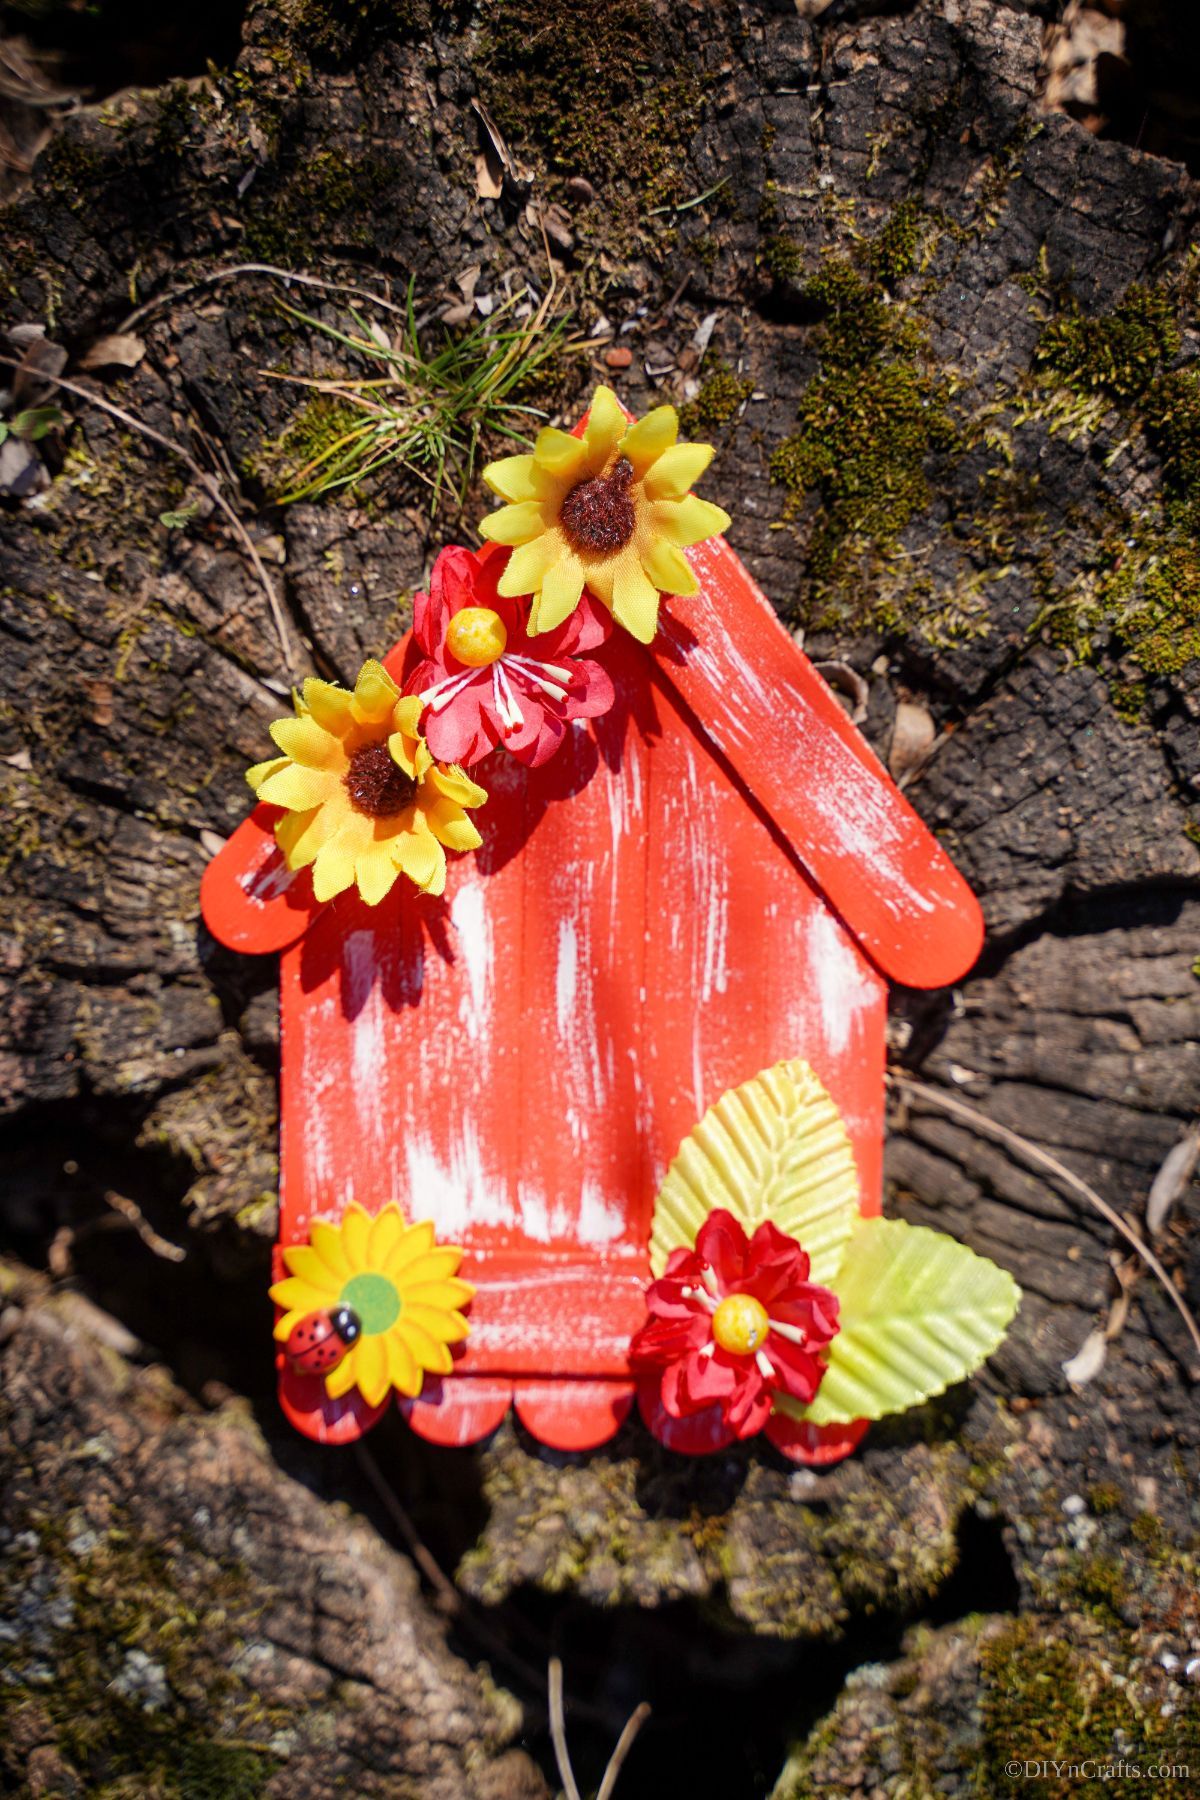
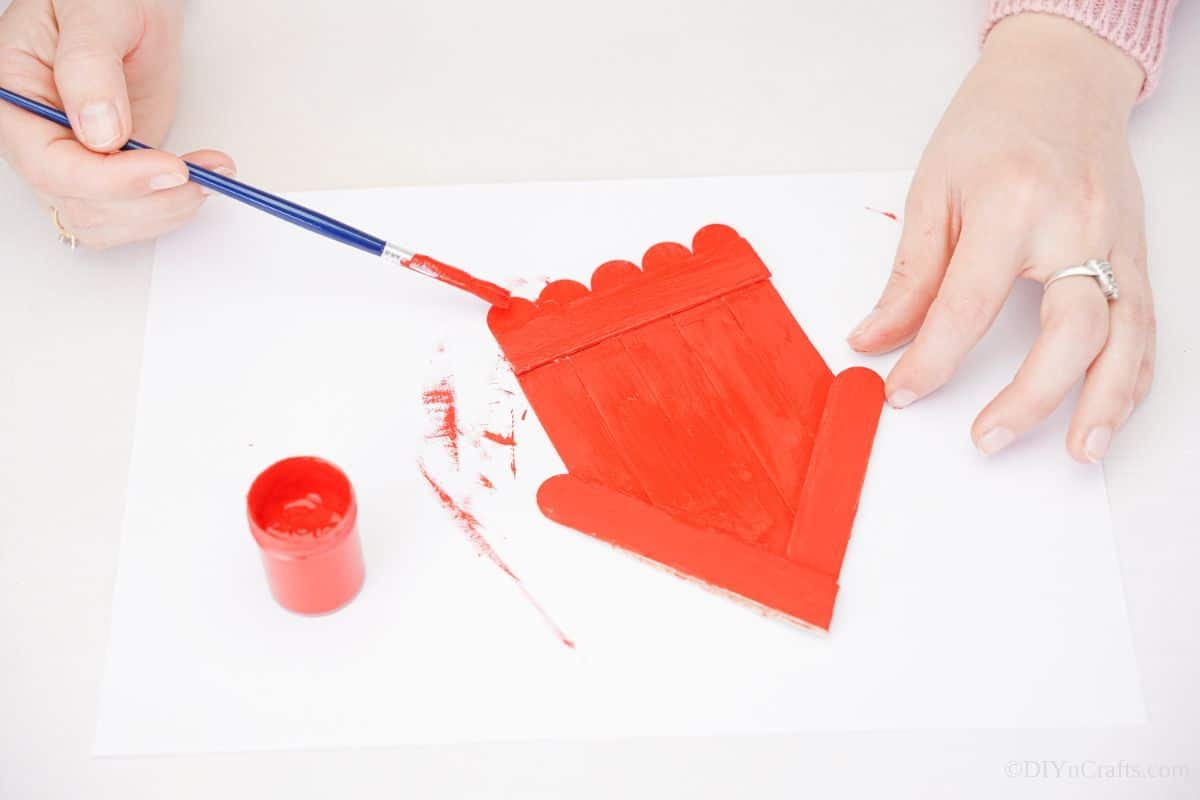
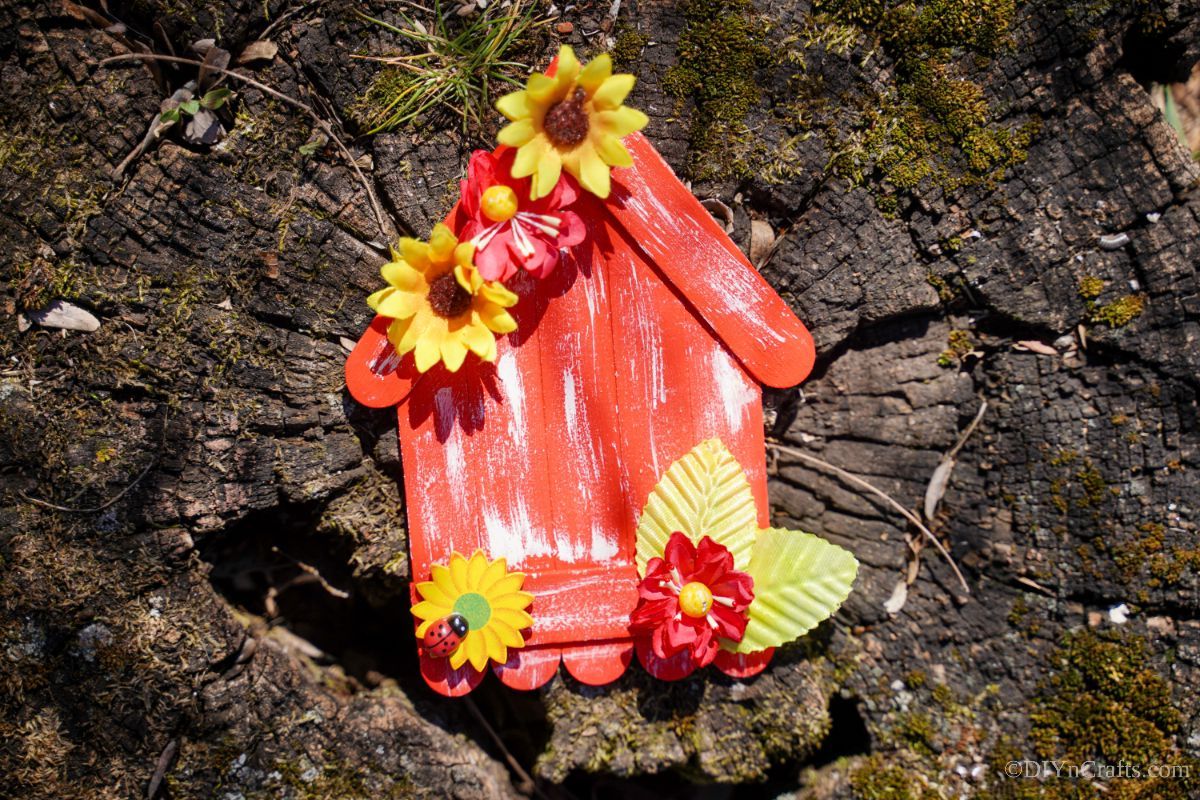
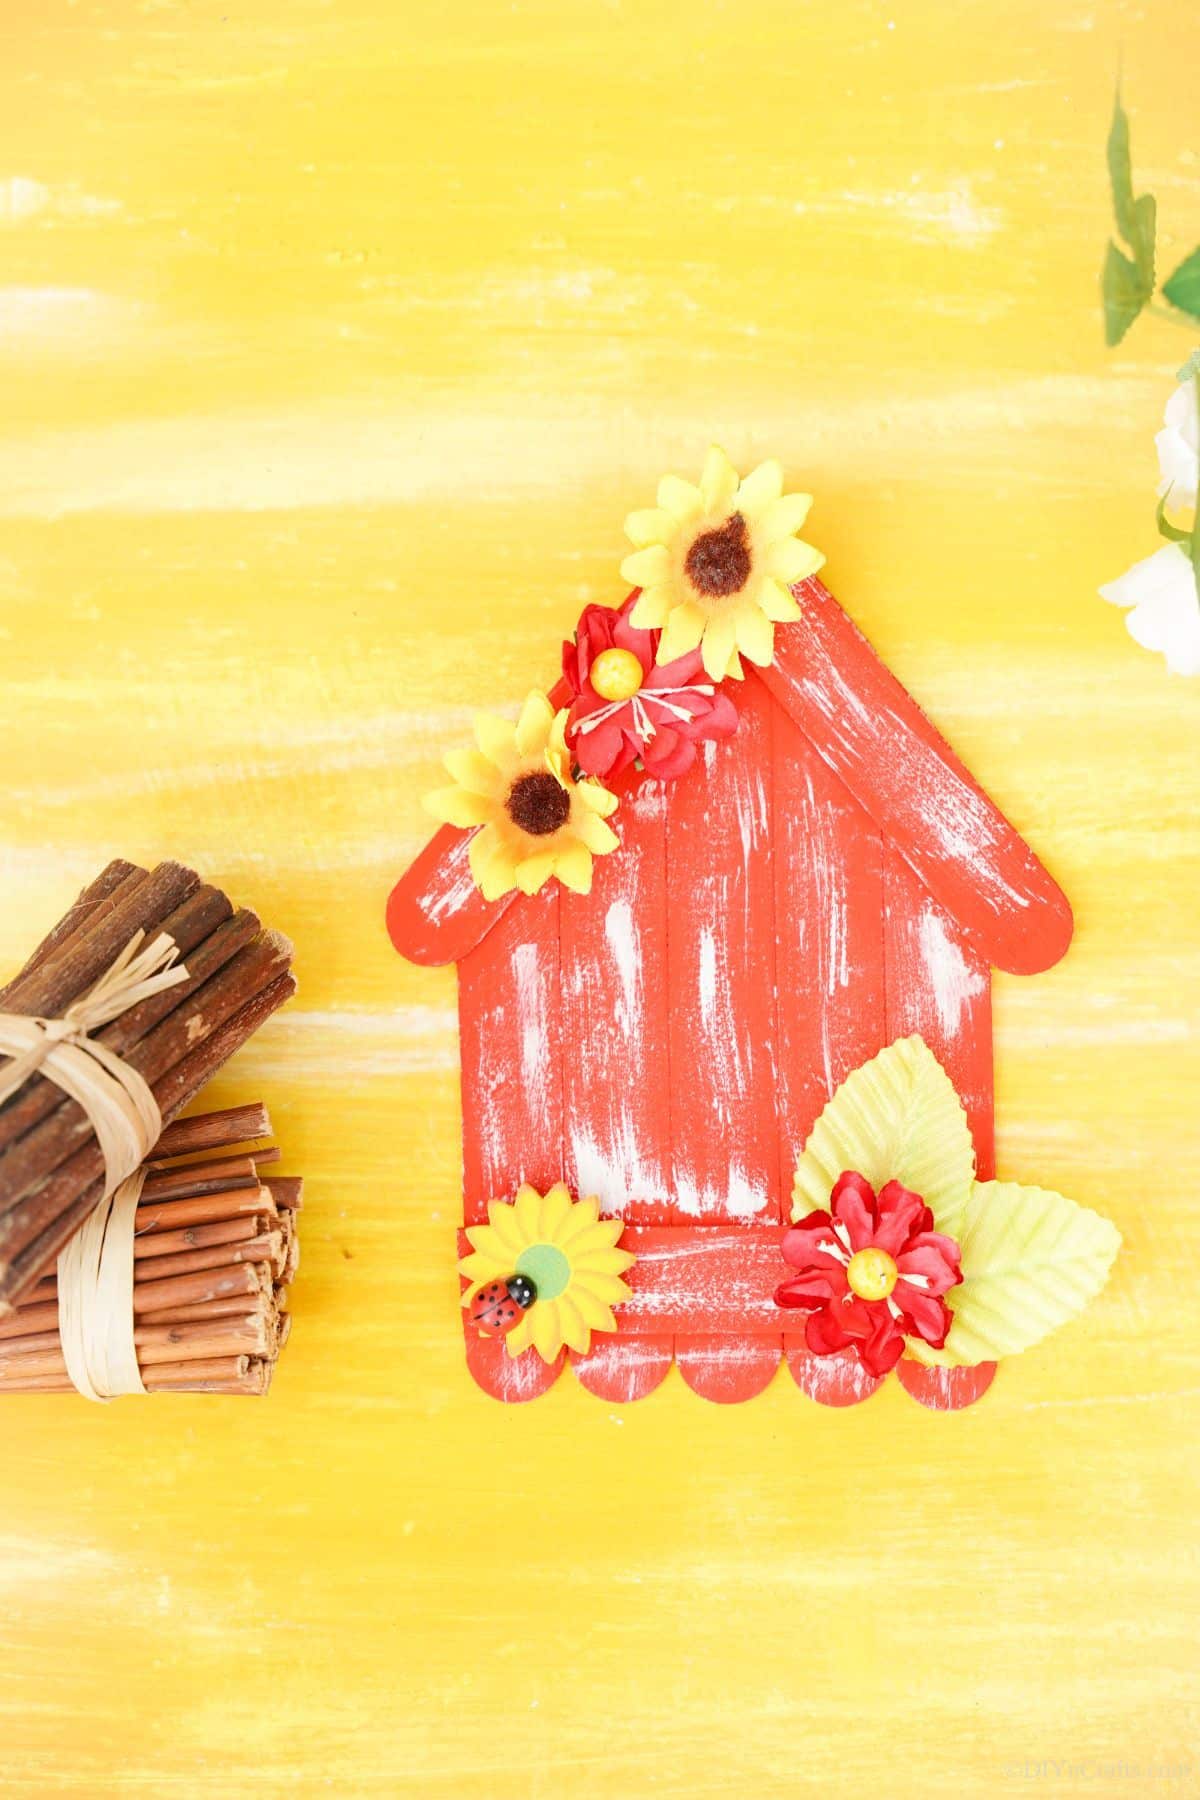
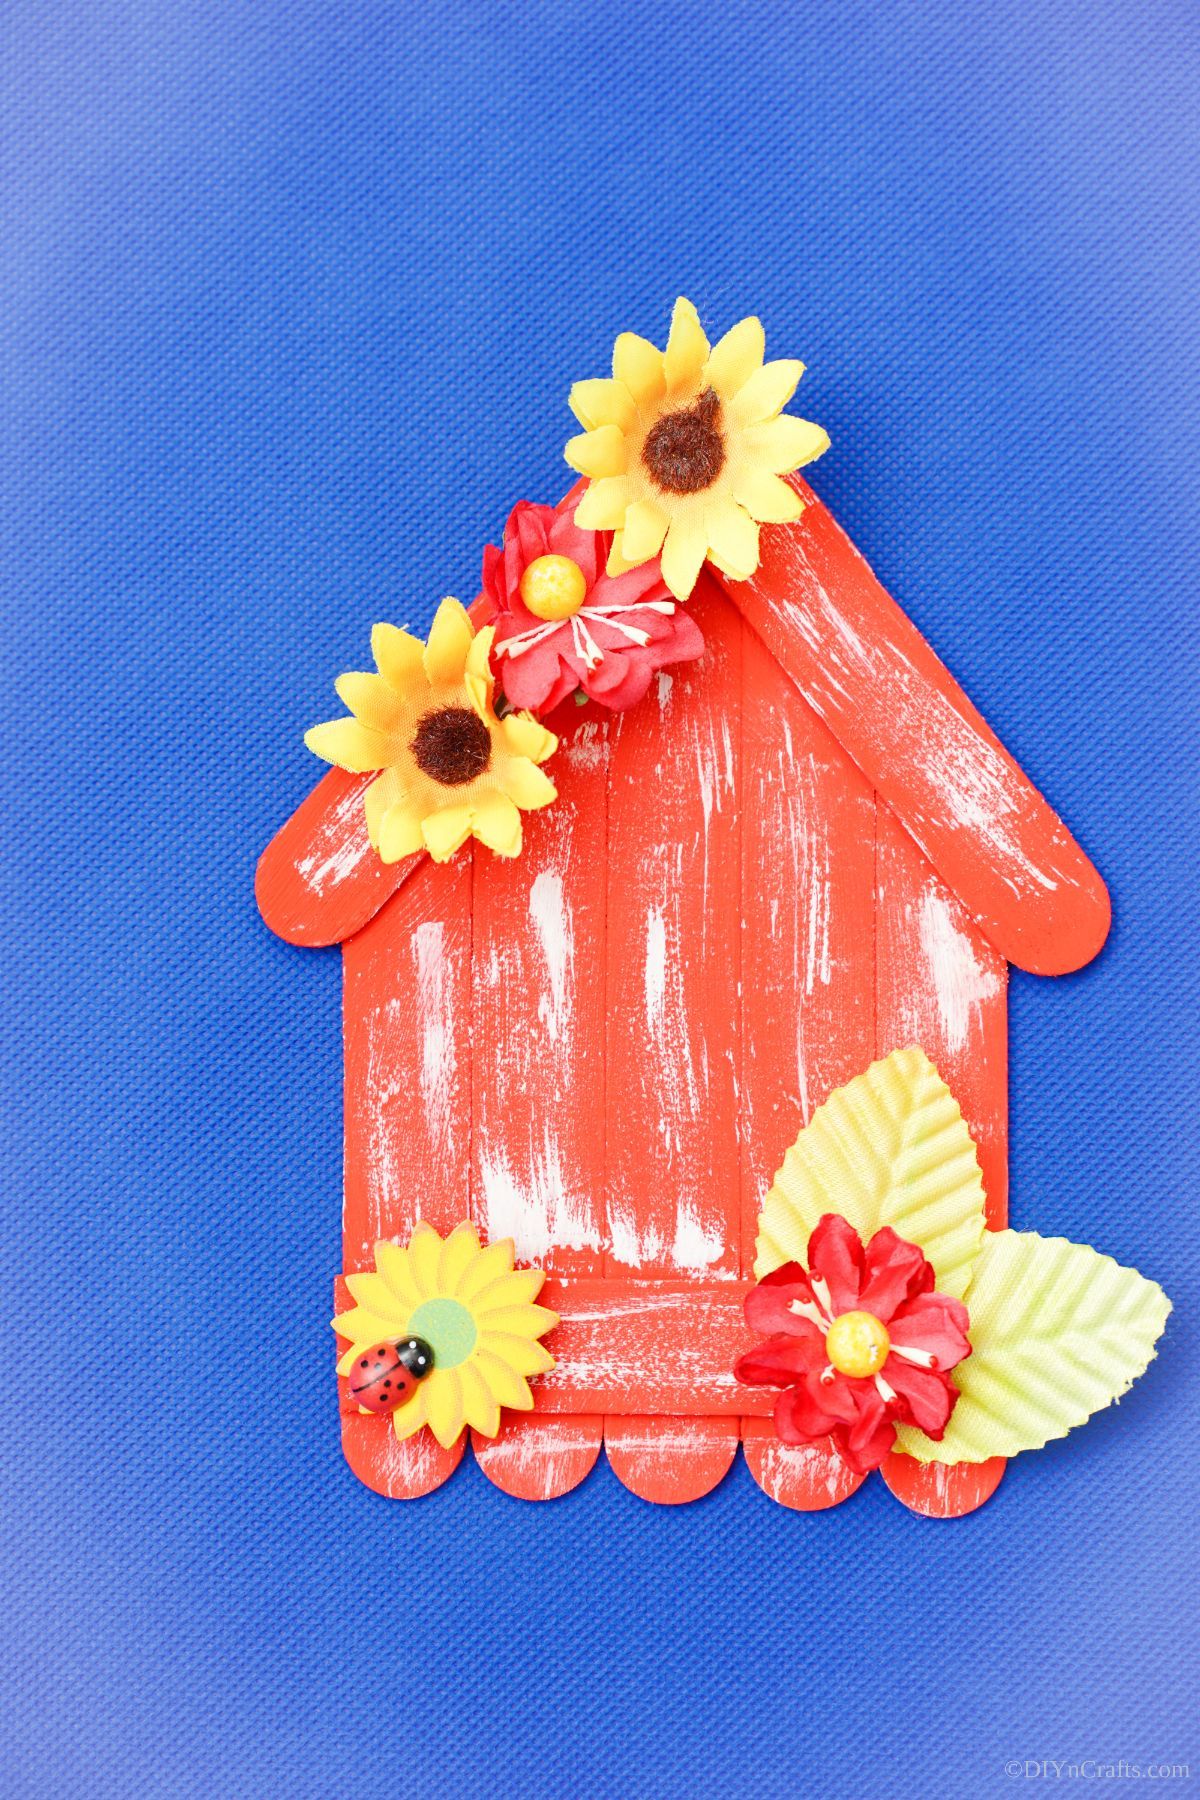
Then it’s time to decorate the house you just built. I painted the house with brown paint and then let it dry before adding accent colors.
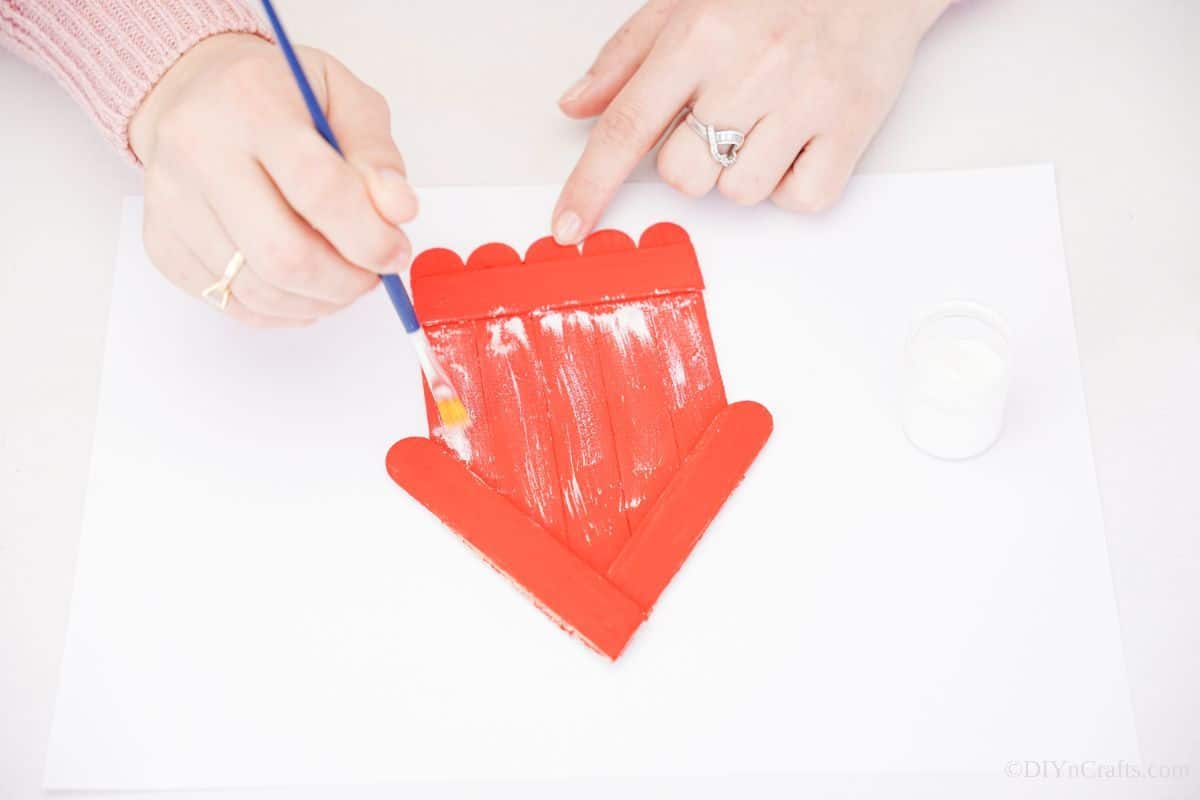
You can also use markers or crayons to give the house a weathered look.
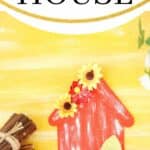
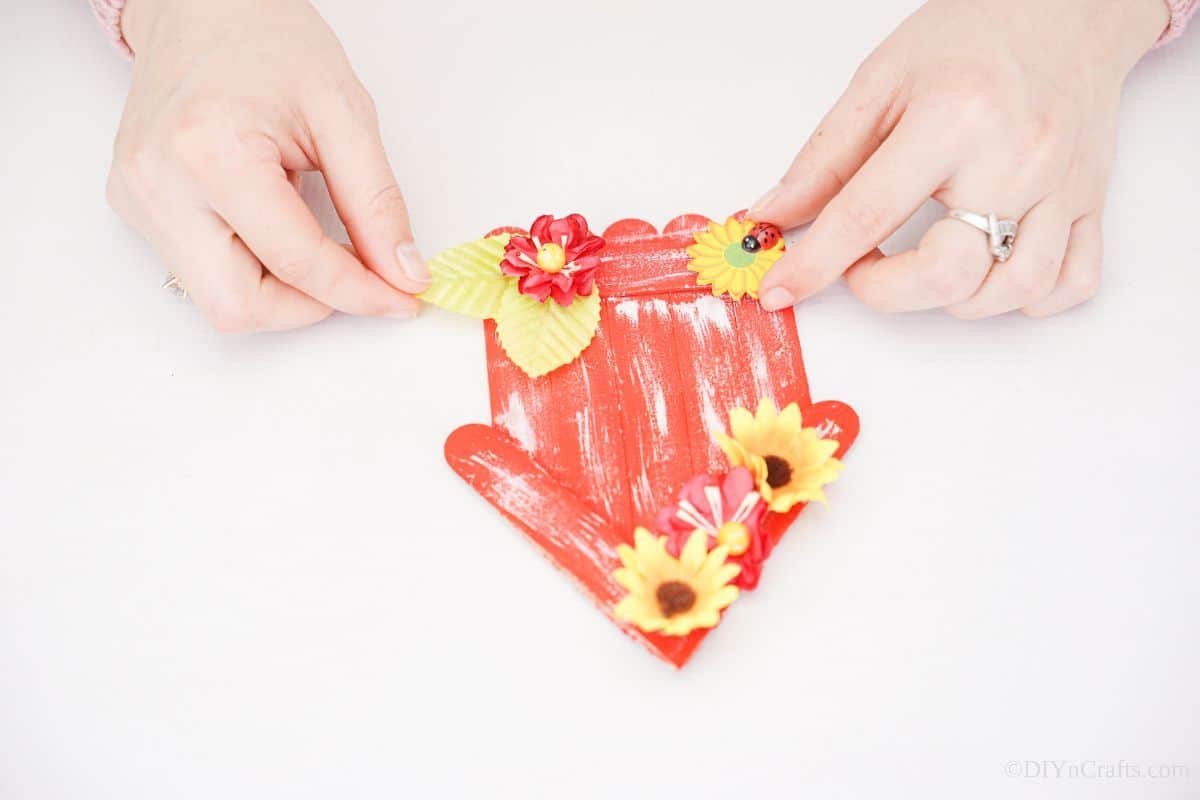
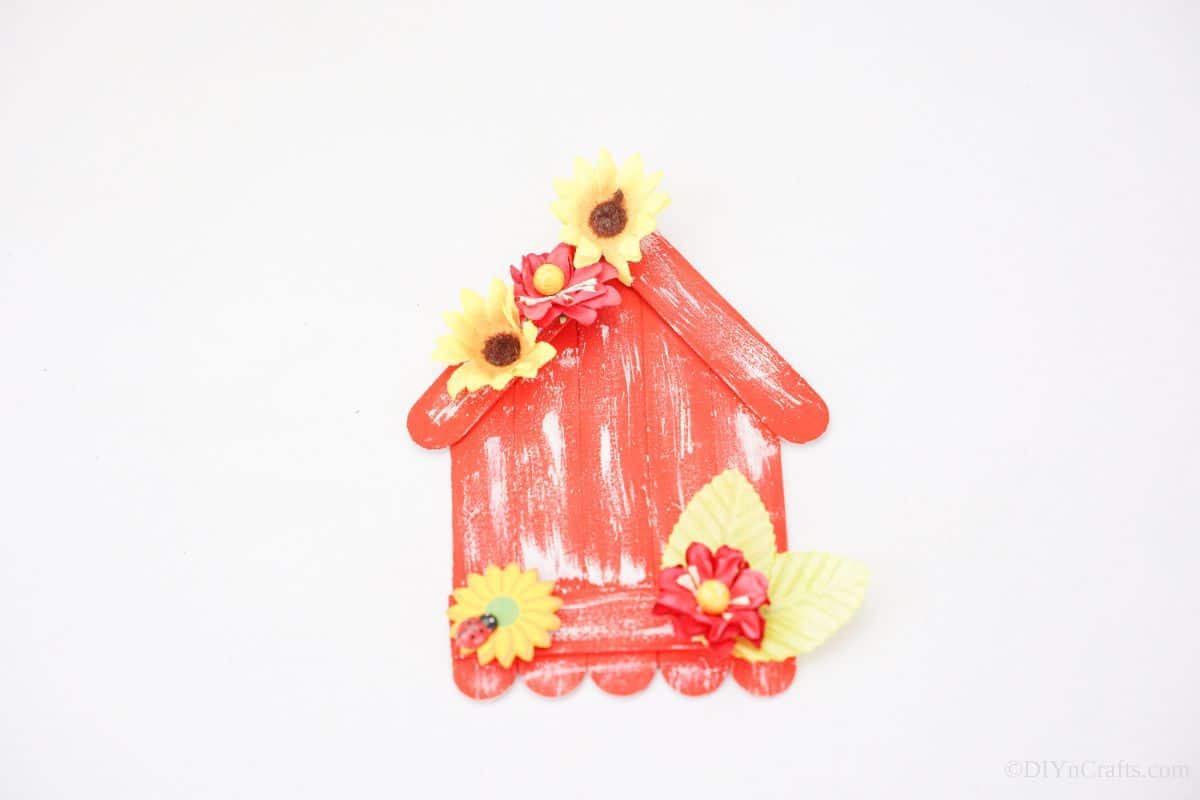
Once everything is dry, you arrange the fake flowers and greenery of your choice around the edges of the house.
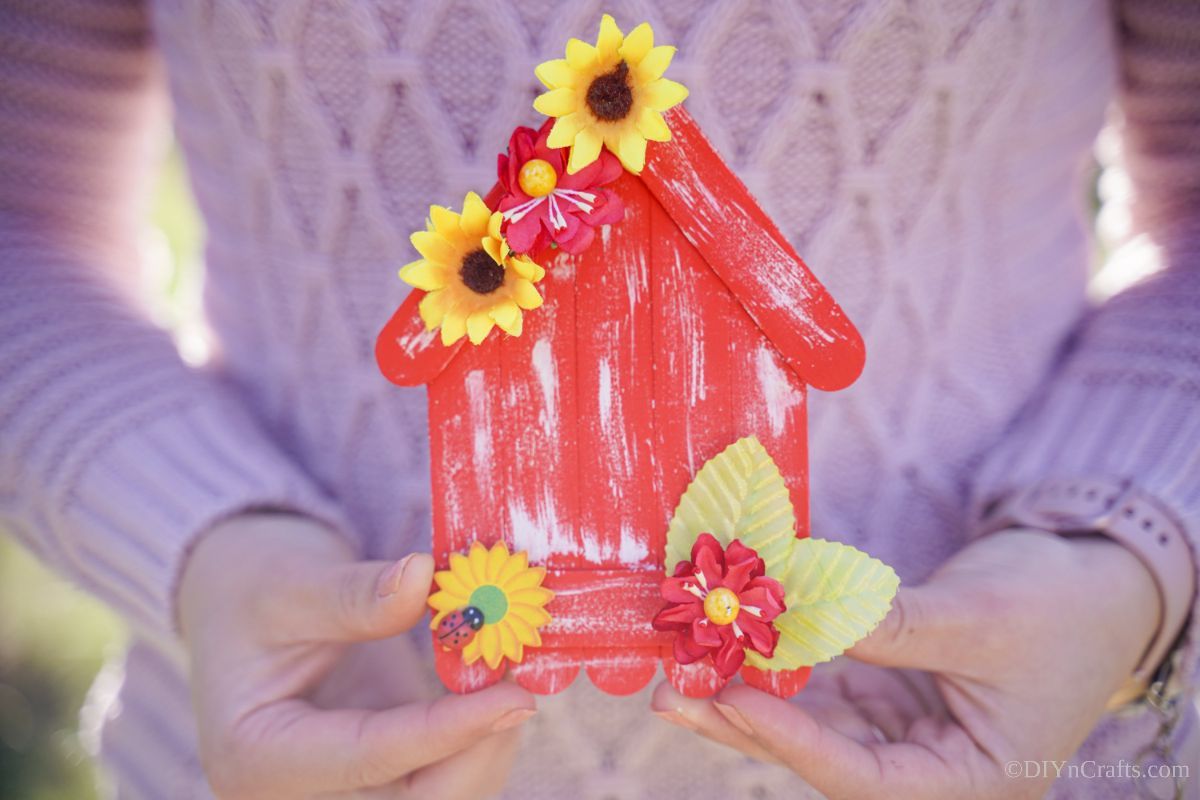
Decorate to your desired look then use as a prop or hang on a wall!
More Craft Stick Projects
If you have a bin of craft sticks and need some ideas on what to do with them, we’ve got you covered! Whether you want to use them for a fun project or get the kids thinking during playtime, these ideas are perfect to get you started. Make sure you bookmark it, print the instructions, or just pin it to your craft board on Pinterest to make right away!
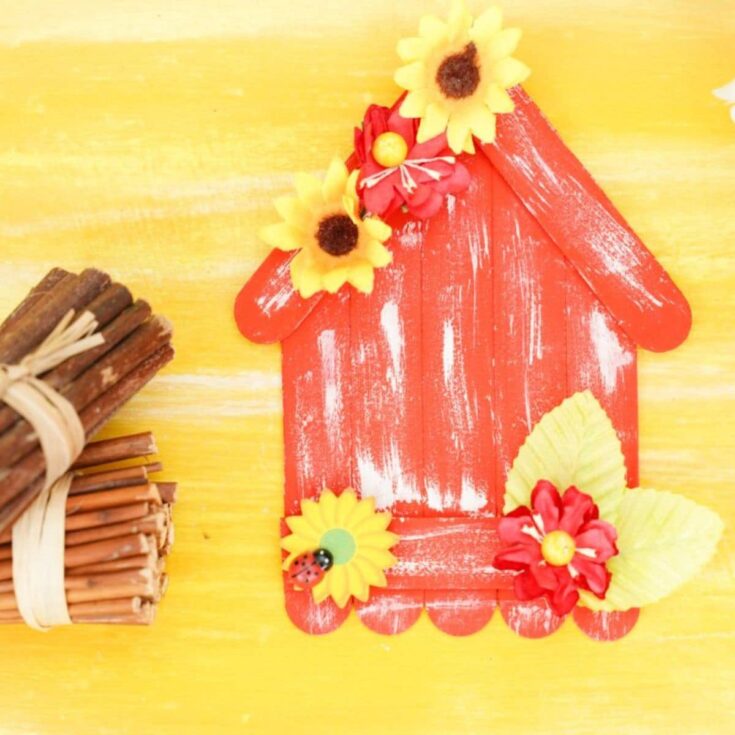
This adorable craft stick house is a perfect decoration for fall! Kids can do it in no time and create their own unique style.
Active Time
15 minutes
More Time
30 minutes
General Time
45 minutes
Depression
EASY
Estimated Cost
$0
Instructions
- Line up the 5 craft sticks side by side.
- Then, place a craft stick on the bottom end, and glue it in place to hold the sticks together.
- Next, place another stick at an angle on the top half so that it rises above the craft sticks.
- Add a second rod on the other side of an angle, creating a triangle/roofline.
- Use a craft knife or scissors, to cut off the excess craft sticks on the sides to give it a traditional pointed roof house look.
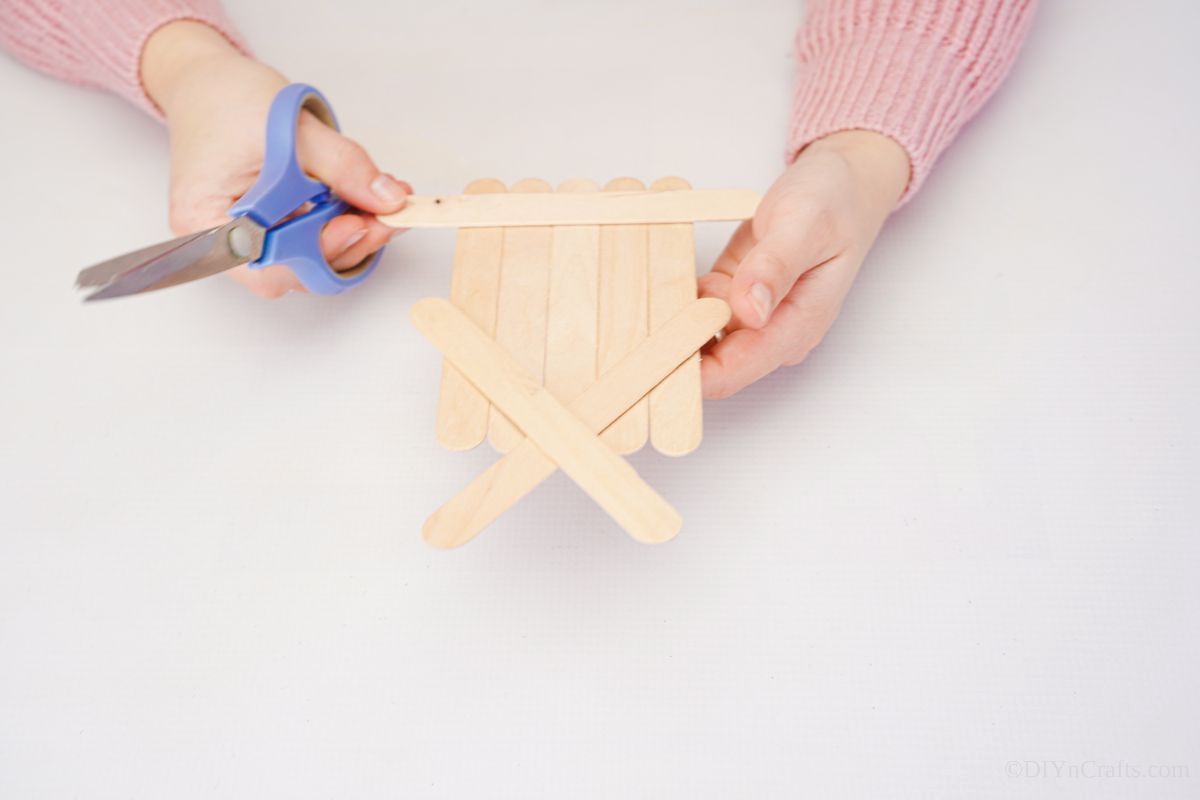
- Now, cut the bottom stick leaving only the shape of the house.
- Next, paint the house with brown or red paint, cover it well, then lay it out to dry.
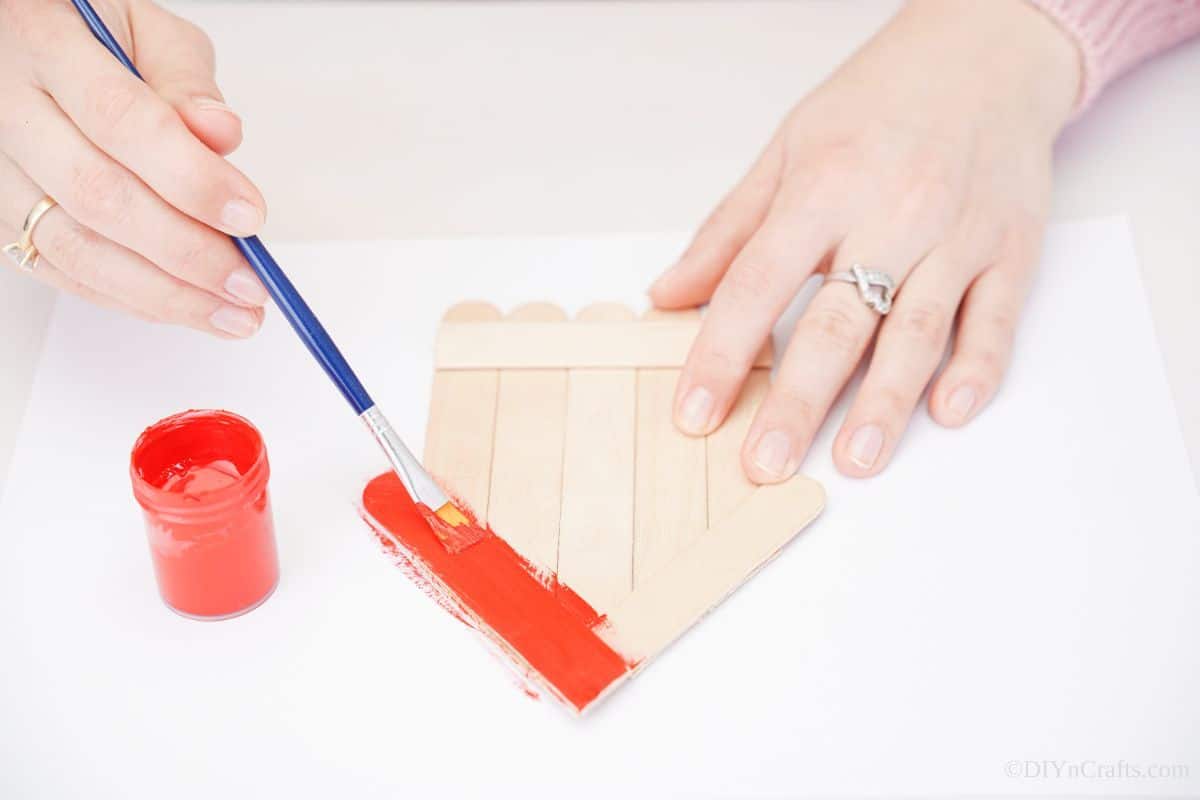
- Once dry, use a little white paint to spray or lightly brush on random areas of the house to give it a weathered look. Then, let it dry.
- Once the house is dry, arrange fake flowers and greenery on top and sides and glue in place if desired.
Notes
Use it as a way to keep the kids busy and let them create a new house with unique colors for each season.
Recommended Products
As an Amazon Associate and member of other affiliate programs, I earn from qualifying purchases.
Finished Project Gallery
This is a great idea that can easily be added to a holiday diorama.
Or just a fun project for kids to do on a rainy day!
[ad_2]
Source link