[ad_1]
After my horrible week spent in bed last week, I finally managed to get into the studio yesterday and made progress. And it feels so good to be back at work! I originally planned to start painting the ceiling, and then work down. But I decided to do the opposite. I start with the floor, and after that, I cover it with protective paper, and then paint the walls and ceiling.
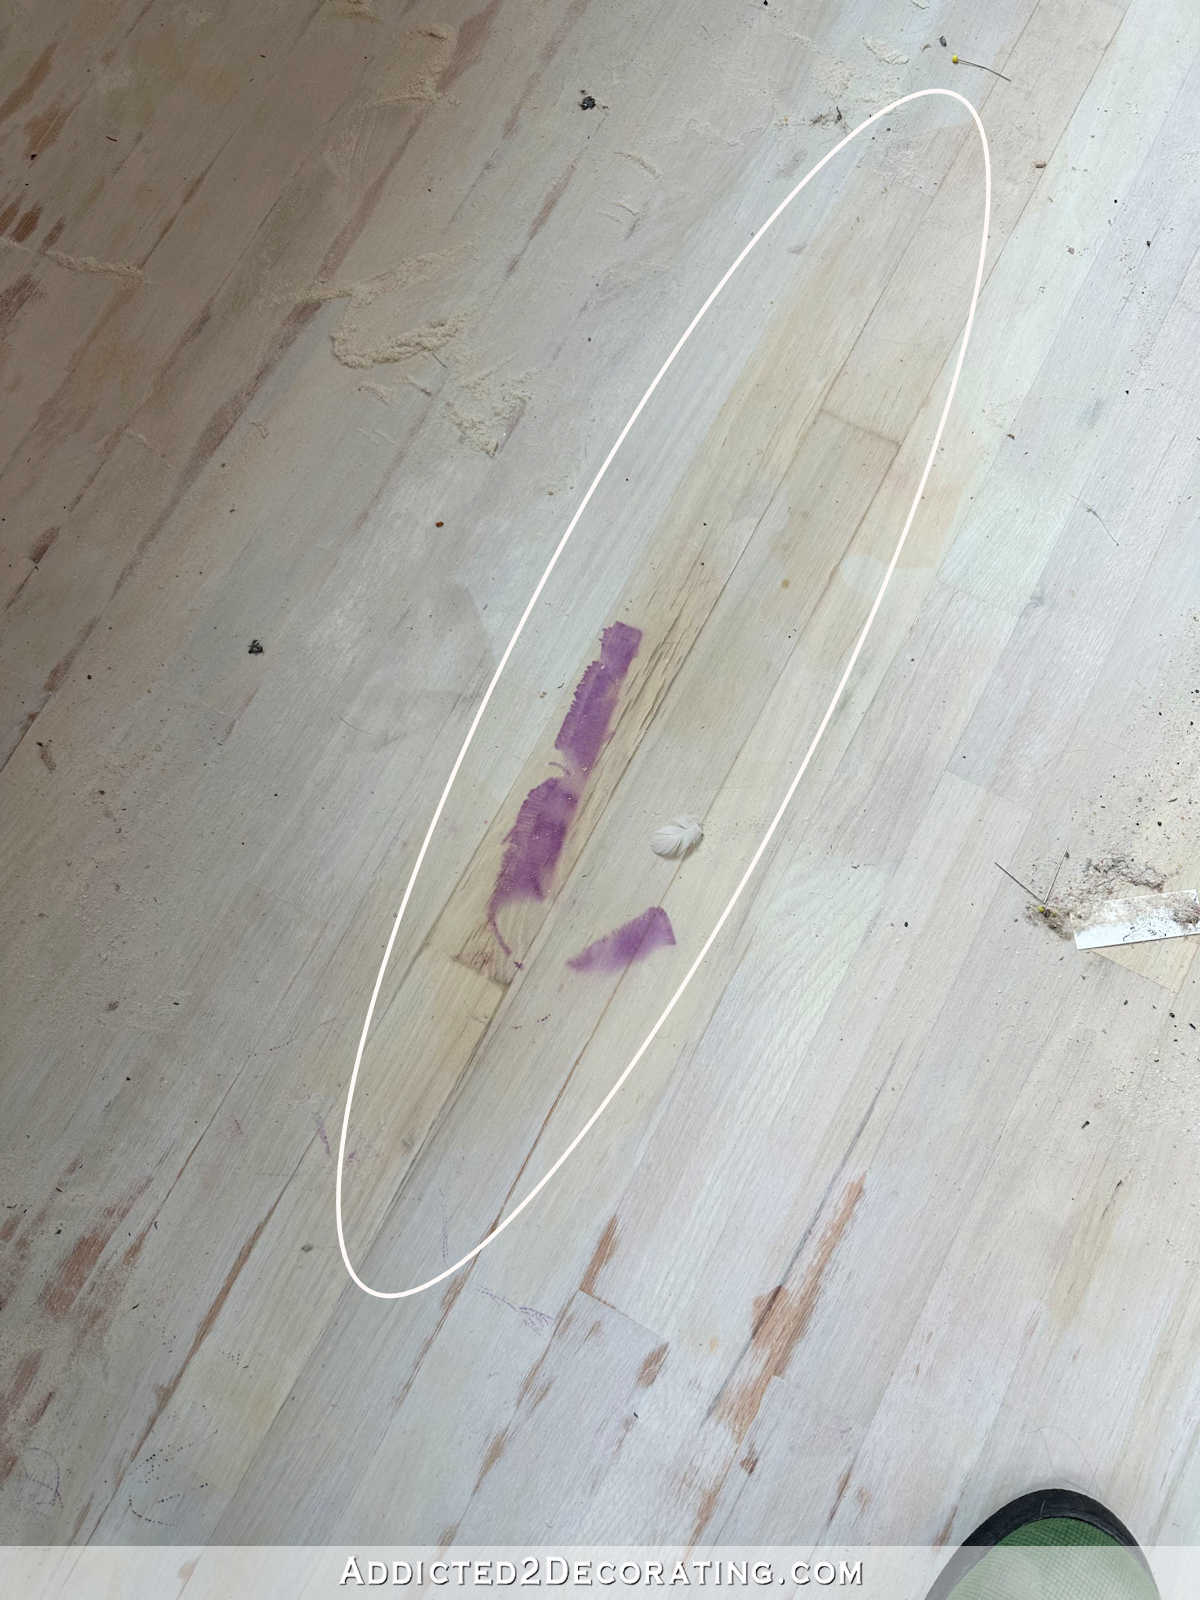
I kept getting comments and messages from people urging me not to redo the studio floor, but it was too late. 🙂 It’s already underway, and it really needs to be done. As I’ve been going through the boxes that have lined the walls for years now, and getting rid of the things I no longer want, I’ve noticed more and more problems with the floor. Stuff leaked into the boxes and stained the floor in several places. Here is an example. I don’t know what this purple thing is, but it’s in two different places on the floor.
Here is some purple stain (maybe ribbon that got wet?), but you can also see how some of the actual floorboards have changed color over the years. See how dark and streaky it is?
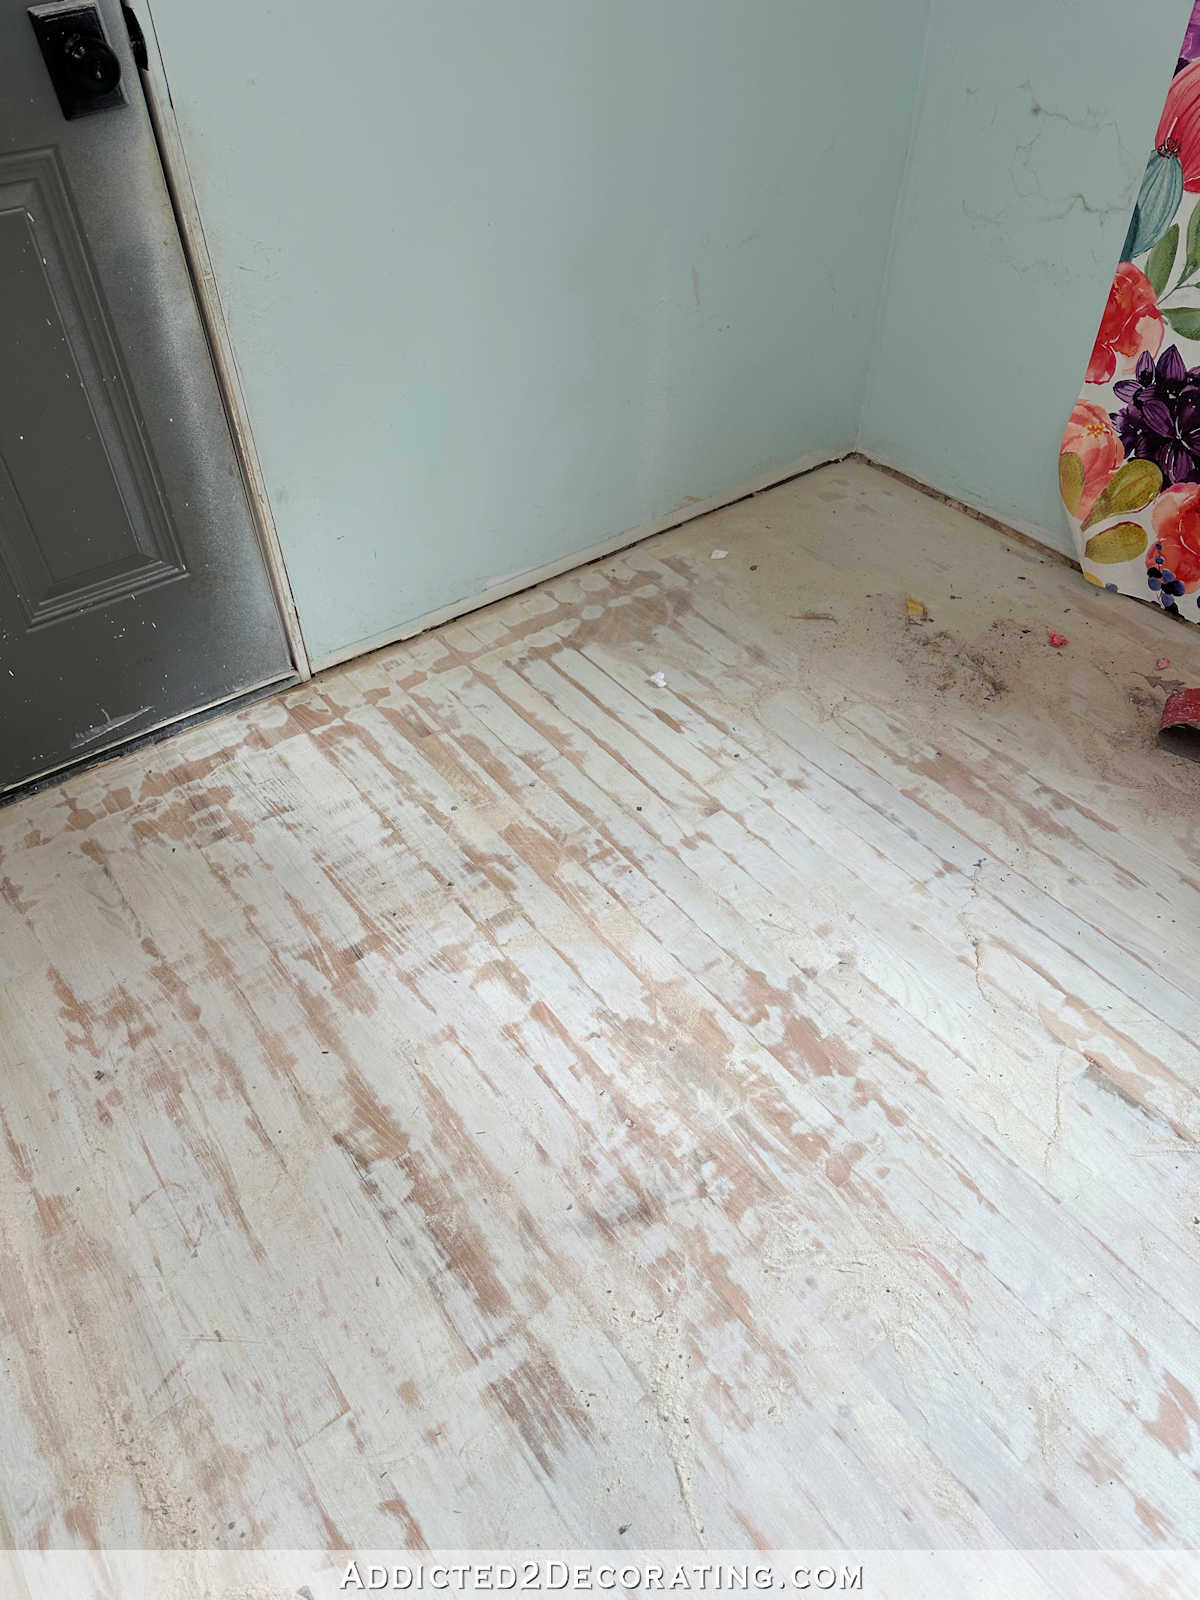
And I have dark boards and spots all over the floor. I know that there is probably no way to completely hide the tannins of red oak for long. At some point, no matter how much prep work you do to get those nice, beautiful, white oak floors, the tannins in the red oak will eventually work their way up and darken the finish. So after a few years, the floor is no longer bright and white. It darkens with brown/amber streaks in places.
And then here to the right of the side door where I have the two-foot-square area of water damage that I told you about. It’s not terrible, but it’s not small either, and it’s right in front of the bank of wall-mounted cabinets with wallpaper.
So as you can see, I started by using my hand held belt sander to sand the floor. I concentrated mostly on the stained and damaged areas, but I also just gave the entire floor a good sanding so the primer had a little bit of a tooth to it. The topcoat I used on these floors was still very smooth, so I didn’t want to put the primer directly on top of it without first scuffing the surface.
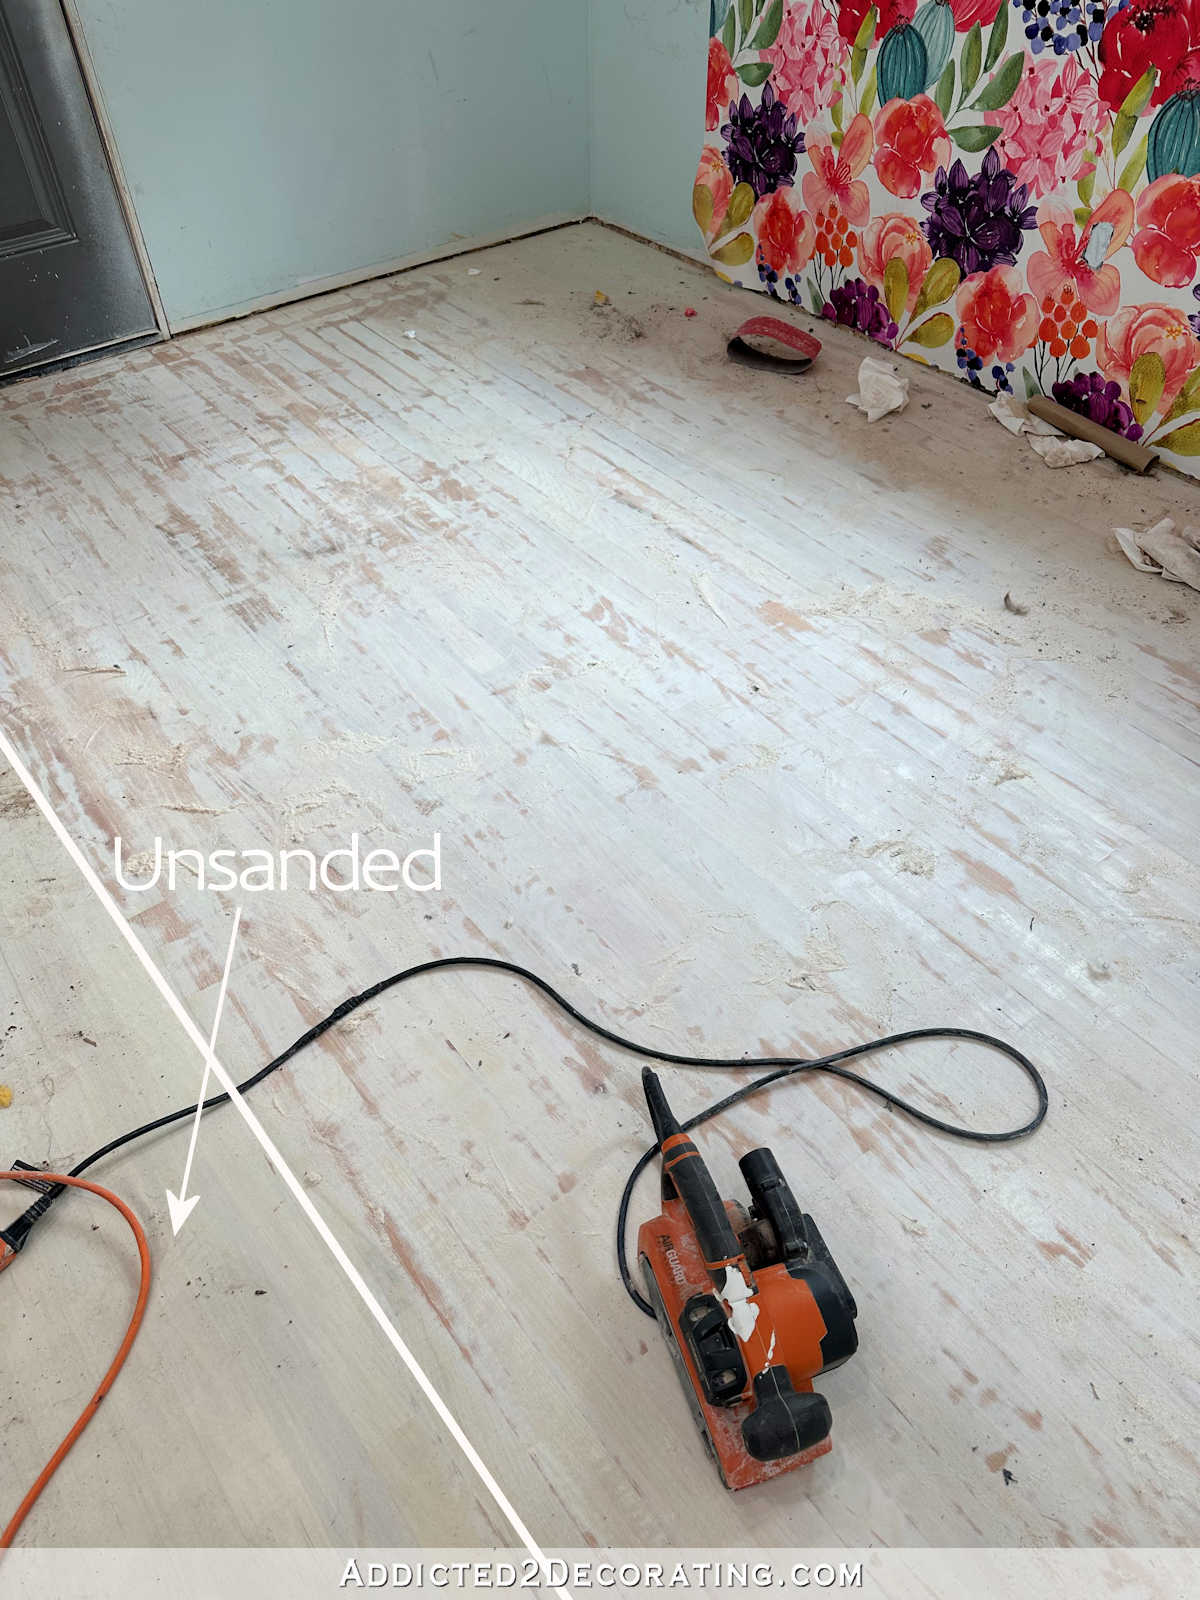
In addition to the areas that have become dark and streaky, you can also see from above how the entire floor (look at the unsanded area compared to the sanded area) in general. I don’t know if that’s from the topcoat darkening over the years, or if it’s a reaction to the floor’s tannins, but the entire floor is much darker than when I finished these floors years ago.
So hopefully it’s clearer now why I want to change the floors. I know some will say, “I can’t believe you aren’t more careful with your floors!” But that’s the point. This is a studio where I use a lot of art products — oil paints, acrylic paints, resin, etc. — and a studio floor needs to be able to take the abuse. I need to have a floor where I can drip paints, resins, dyes, etc., and then when things get a little out of control for my taste, I can easily fix them up to make them look good. again. The obvious solution in my mind is a painted floor.
The frustrating thing about redoing the floor is that I realize I can easily do half the floor at once. So this is going to be an interesting process as it unfolds. Now, I work on this side of the room…
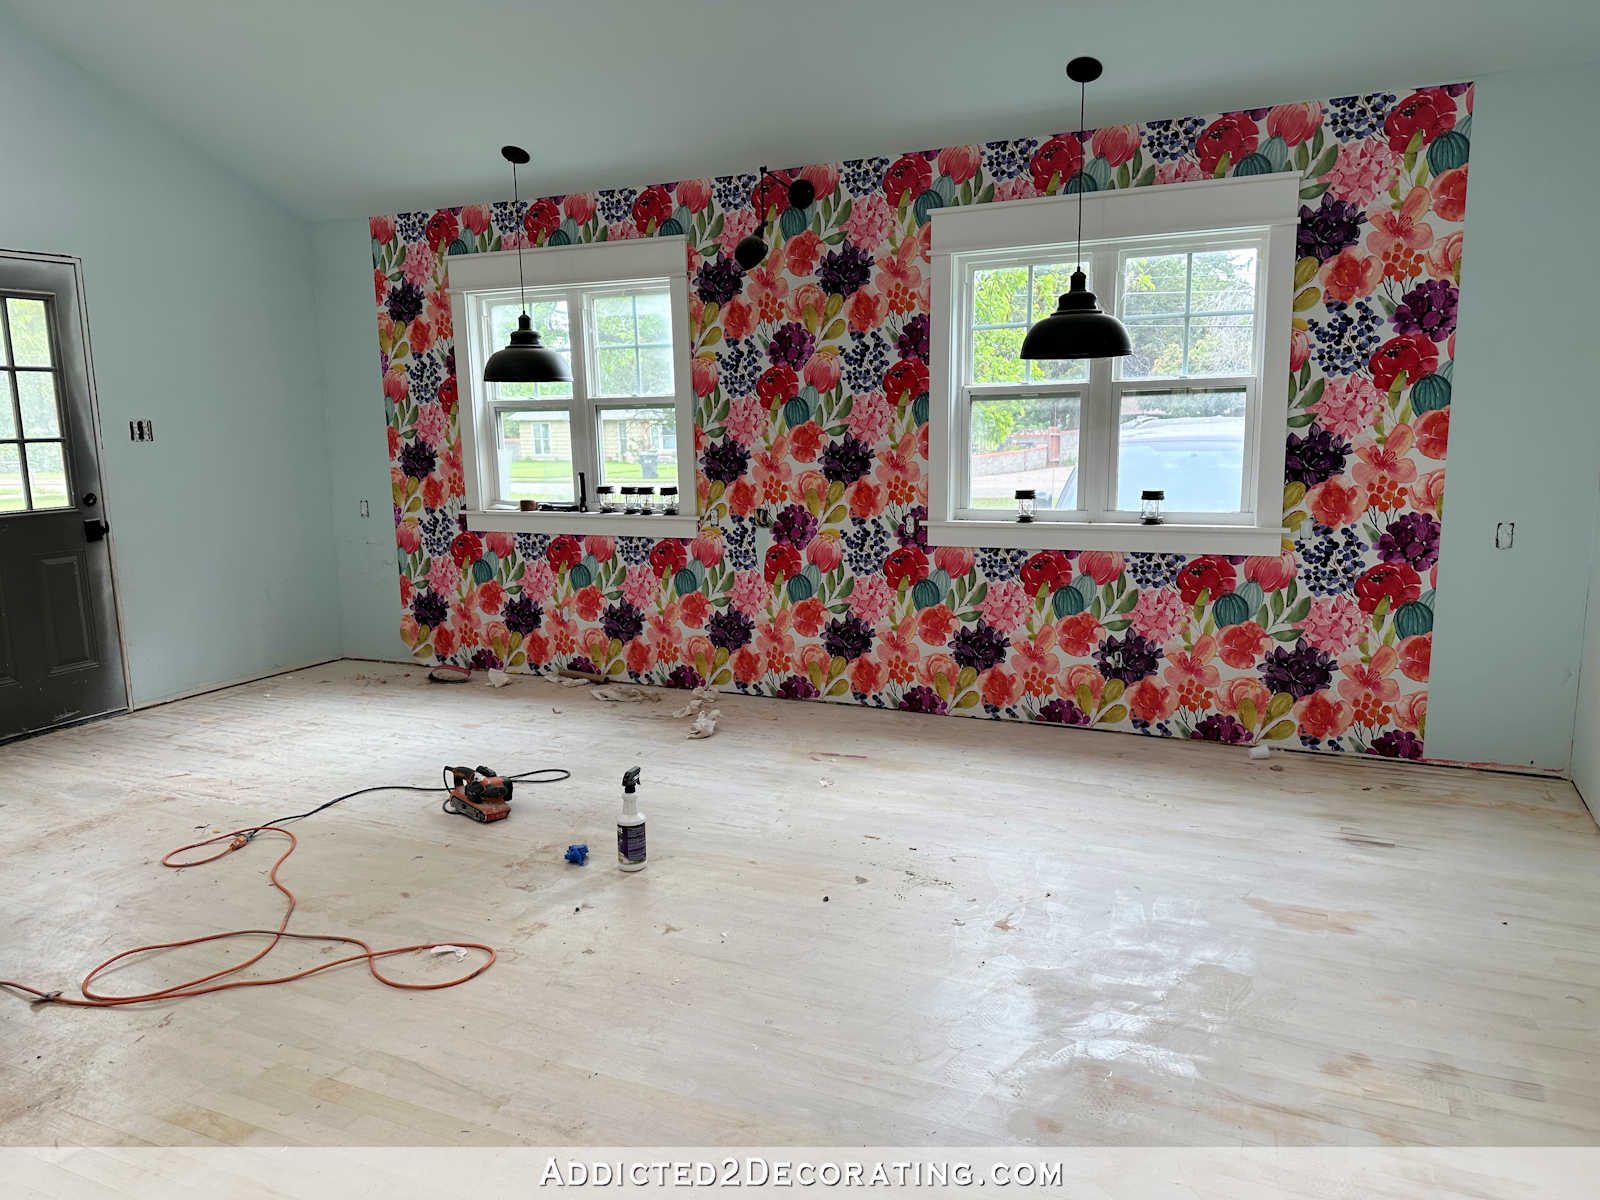
While the other side of the room looks like this…
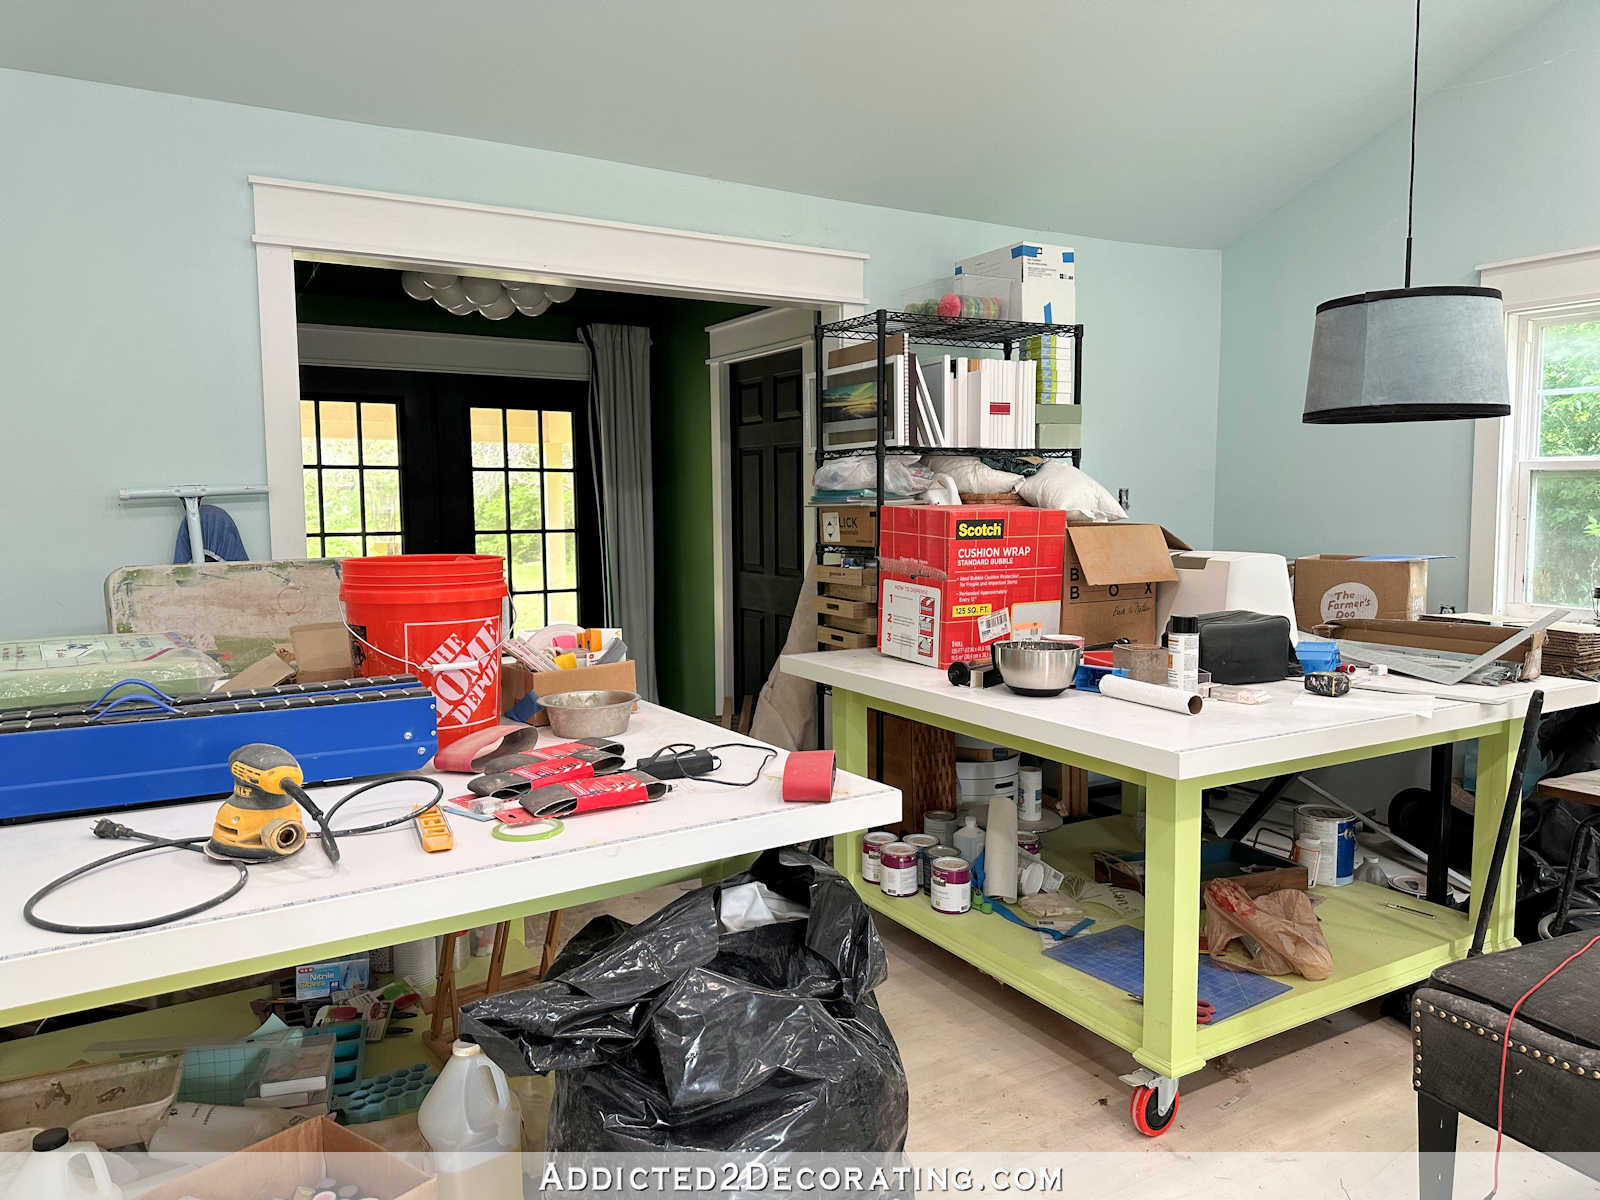
I have a big idea in my head that I can put everything nice and neat in boxes and put them in one place, and then roll my tables out of the room while I work across the floor.
Well, that’s funny. This is my last room, so there is no place to store a bunch of boxes outside of this room. We use every room in our house, and Matt can’t handle a bunch of boxes. And then there are the tables. About 61 square inches. The only possible way for them to get out of the room was through the back French doors and under the carport. But with our weather lately (thunderstorms, hail, tornado warnings), I really don’t want my two tables outside, even if they are under the carport.
So the only solution I can do is to make the floor in two parts. I’ll do the part I’m working on now — sand, fill, prime, and paint — and when it’s dry, I’ll cover it with protective paper and move everything to that side of the room and start over. the other side. Then when that side is done, I can assemble my cabinets, put them in place, and then have actual places to store these things while I finish the studio.
It’s not ideal, but sometimes we have to do and come up with solutions when we live our DIY projects! 😀 And I have full confidence that it will work in the end.

Addicted 2 Decorating is where I share my DIY and decorating journey as I remodel and decorate the 1948 fixer upper that my husband, Matt, and I purchased in 2013. Matt has MS and is physically unable to work, so I did most of the work at home by myself. You can learn more about me here.
I hope you’ll join me on my DIY and decorating journey! If you want to follow my projects and progress, you can subscribe below and get every new post sent to your email inbox. That way you won’t miss a thing!
[ad_2]
Source link